Short version
lsblk to find the drive
sudo fdisk /dev/<device> to create a partition(s)
sudo mke2fs <device> to create filesystem
sudo nano /etc/fstab (optional) to mount on boot
sudo mount -av to mount (if added to fstab) without rebooting
This works on most Linux distros. I'm using Ubuntu in this example.
Finding the device
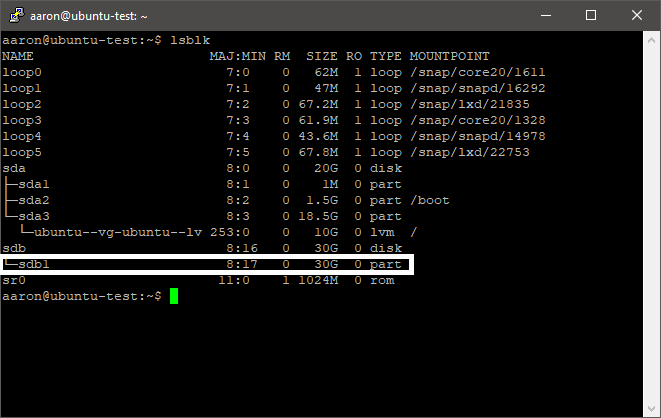
Type lsblk to list devices connected to the system.
lsblk
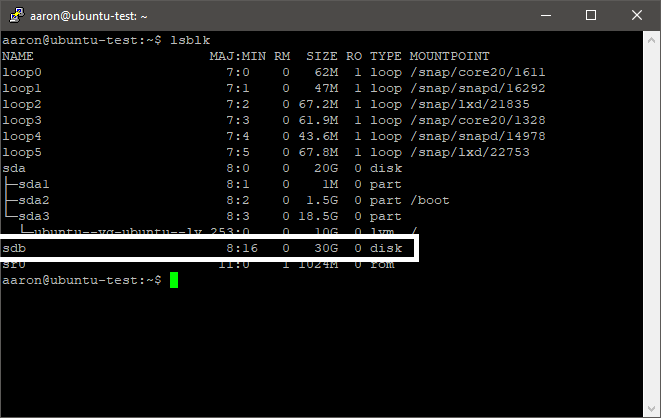
The device label will vary depending on your system (ex: sd<id>, nvme<id>, etc.)
If the drive is already partitioned you may see "part" types under the "disk" type (ex: /dev/sdb1 under /dev/sdb).
If you want to repartition the entire disk use the "disk" type.
Make sure you're selecting the correct device if it already has partitions. The device may contain data if it's already partitioned.
Partitioning the device
This step is optional but recommended.
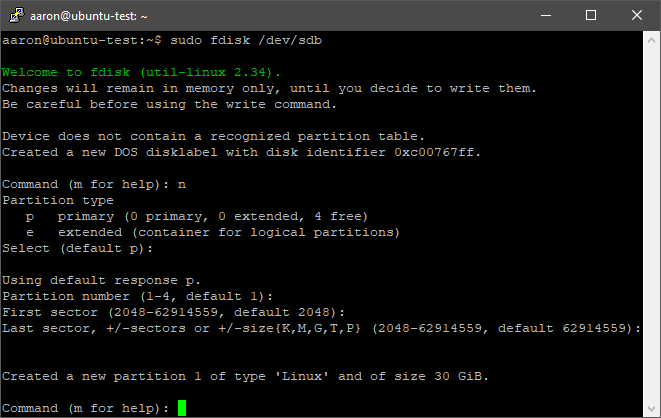
Run sudo fdisk /dev/<device> to open fdisk with /dev/<device> selected.
sudo fdisk /dev/<device>
If you're selecting an existing "part" type you can use it in the device command (ex: fdisk /dev/sdb1)
You can type m at any time to print the menu options.
Changes are not made until you use the write command. You can exit without making changes by typing q.
fdisk will create a DOS or GPT (depending on device size) partition table by default if it does not already exist.
Type n to add a new partition.
Press enter to select primary partition type.
Press enter to use default partition number 1.
Press enter for first and last sector to use the full disk.
The next step will erase all data on the selected device. Now is a good time to check your backups.
Type w to write changes to the disk.

Creating the filesystem
Automatic ext Filesystem
If you can use ext2/ext3/ext4 and don't know or care which one is being used, mke2fs can automatically decide on a filesystem based on the device.
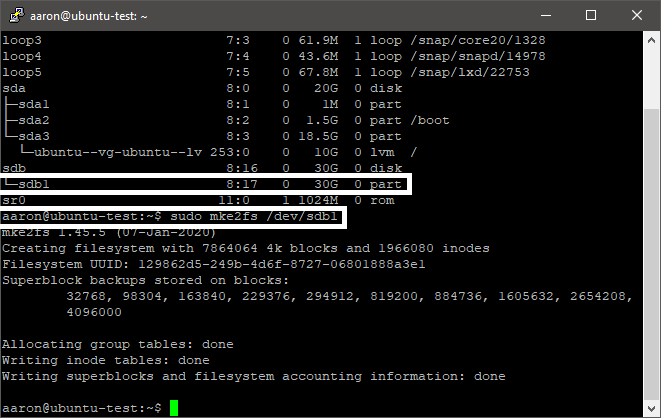
Run sudo mke2fs /dev/<device> to create the filesystem
sudo mke2fs /dev/<device>
Use the "part" type if you created a partition in the section above. (ex: sudo mke2fs /dev/sdb1)
Specific Filesystem
If you need a specific filesystem type you can use sudo mkfs -t <filesystem type> /dev/<device> to build the filesystem on the device.
sudo mkfs -t ext4 /dev/<device>
Mounting on startup
Create mount point
Use mkdir to create a location to mount the new device if you haven't already.
I'm using /mnt/second-drive in this example.
Run sudo mkdir -p /mnt/second-drive
sudo mkdir -p /mnt/second-drive
-p: Create intermediate directories as required.
Finding the filesystem type
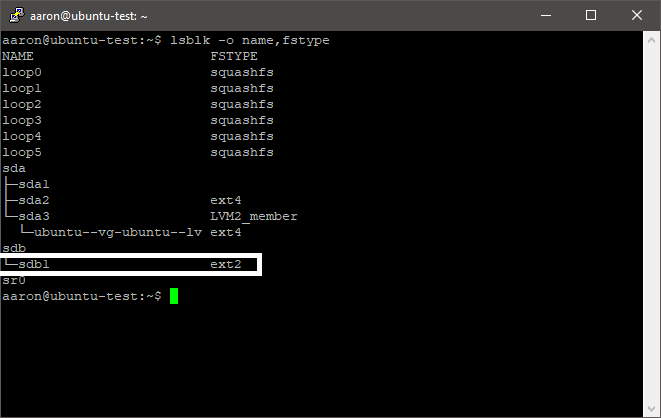
Use lsblk -o name,fstype to list the devices and filesystem types.
lsblk -o name,fstype
Take note of the device name and filesystem type.
In this example the device is /dev/sdb1 and the filesystem type is ext2.
Add to fstab
Run sudo nano /etc/fstab to edit the fstab file.
If you're using putty you may want to full screen the window to make it easier to read.
sudo nano /etc/fstab
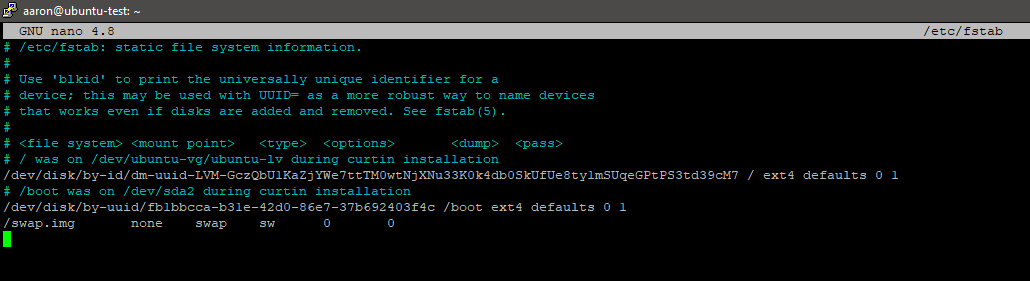
Your fstab might look different. That's ok.
Move your cursor (down arrow) to the bottom of the document.
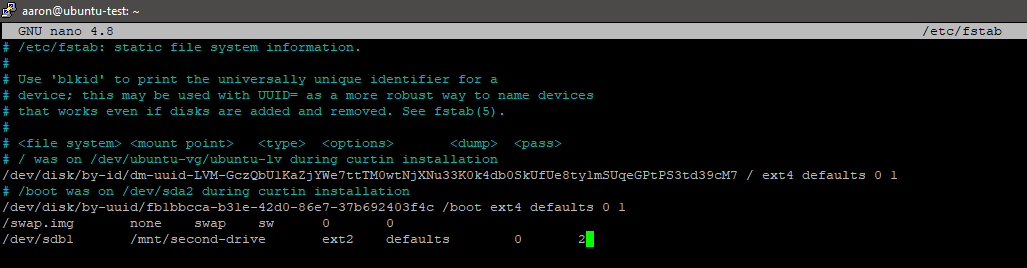
Enter your device and press tab. The screenshot below uses /dev/sdb1
Enter the mount point from the create mount point section then press tab. The screenshot below uses /mnt/second-drive
Enter the device's filesystem type from the finding the filesystem type section then press tab. The screenshot below uses ext2.
Enter mount options then press tab. See the mount manpage for more details. The screenshot below uses defaults. Note the s in defaults.
Enter the dump value (0 or 1) then press tab. See below for more info on the dump setting. The screenshot below uses 0.
Enter the pass value (0-2) then press tab. See below for more info on the pass setting. The screenshot below uses 2.
Here's more info on the dump and pass settings from Ubuntu's fstab page.
dump: Enable or disable backing up of the device/partition (the command dump). This field is usually set to 0, which disables it.
pass: Controls the order in which fsck checks the device/partition for errors at boot time. The root device should be 1. Other partitions should be 2, or 0 to disable checking.
Press ctrl+x to exit then y and enter when prompted to save modified buffer.
Your new device will be mounted on next reboot.
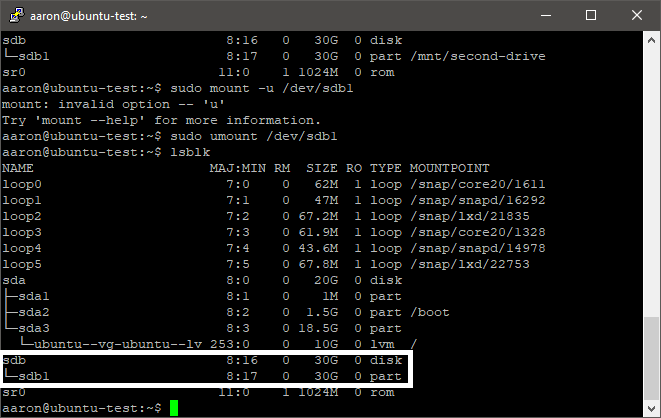
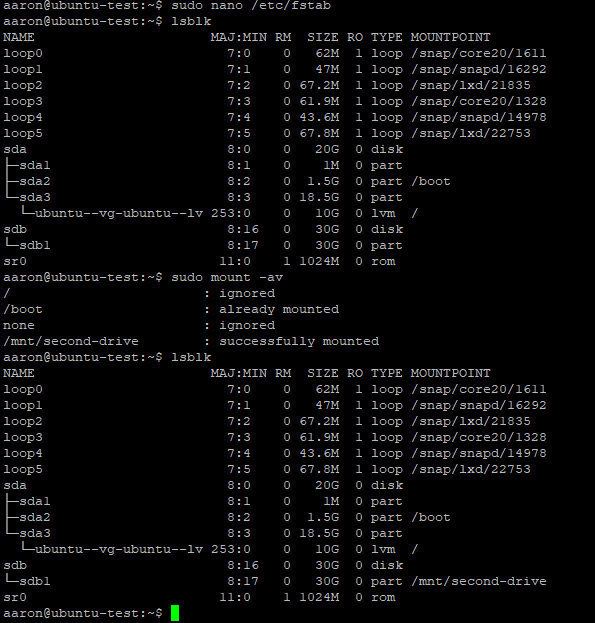
Use sudo mount -av to mount the new drive without rebooting.
sudo mount -av
Unmounting
You can unmount with sudo umount <mount point> (ex: sudo umount /mnt/second-drive) or sudo umount <device> (ex: sudo umount /dev/sdb1).
The device will mount on reboot or when you run the mount -av if you do not remove it from fstab.
sudo umount /dev/<device>