This post covers Backblaze for bucket storage. You could use any S3 compatible bucket storage.
Backblaze Setup
If you're using a USB drive you can skip to Synology Setup below.
Create a B2 Cloud Storage account
This is a friendly reminder to setup MFA before you forget about the account.
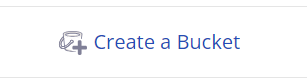
Click Create Bucket on the buckets page after you're logged in.
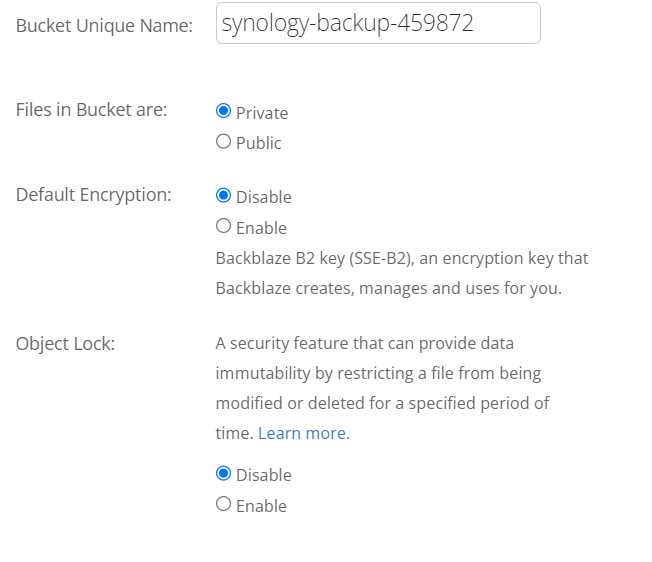
Use the settings below for the new bucket
Bucket Unique Name: The bucket's name must be unique to Backblaze, not just your account.
Files in Bucket are: You will want this to be private in almost all cases.
Default Encryption: This is disabled by default and is optional. We'll enable encryption on the Synology side later.
Object Lock: Disabled by default. Hyper Backup creates a single file for backups so this probably won't work as intended.
Go to Account > Application Keys to open the Application Keys page.
Scroll to the bottom and click Add a New Application Key.
Do not use a Master Application Key!

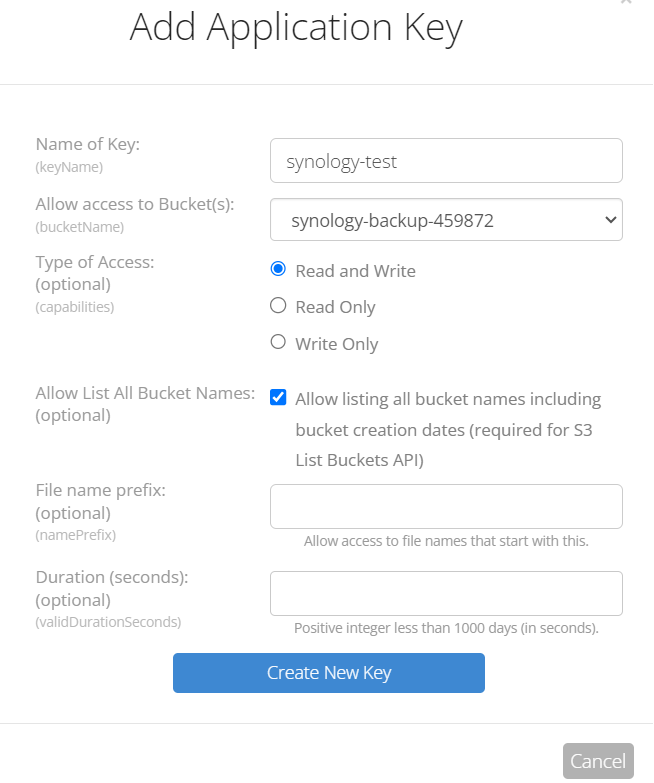
Use the settings below for the new application key and click Create New Key
Name of Key: The name doesn't have to match the bucket but it's a good idea.
Allow access to Bucket(s): Change to the bucket you created above unless you need access to multiple buckets.
Type of Access: Read and Write
Allow List All Bucket Names: Checked
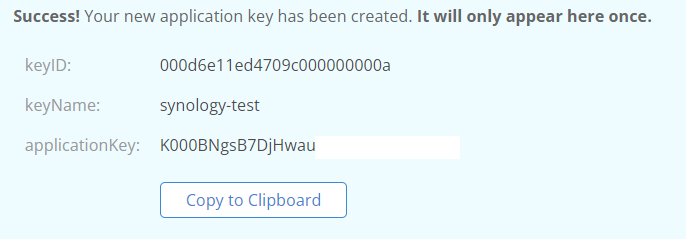
Copy the new key info. This is the key for the bucket and is not related to backup encryption.
Treat this information like a password!
I'm showing most of the key here because it was deleted after this post. Don't do this!
Synology Setup
Skip to USB setup if you're not using Backblaze.
Backblaze Bucket Setup
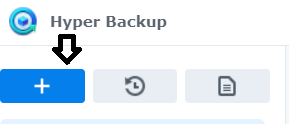
Log into the NAS and open Hyper Backup. Click the + button to add a new backup job.
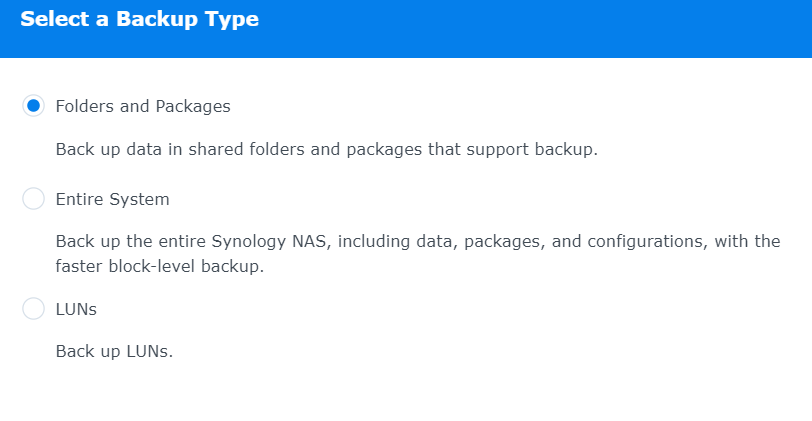
Select the backup type. This example is using Folders and Packages.
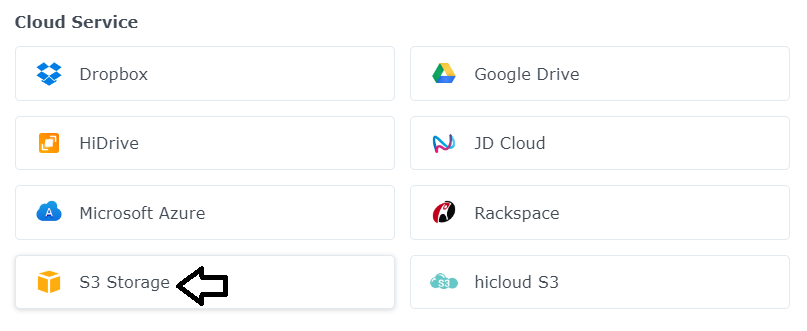
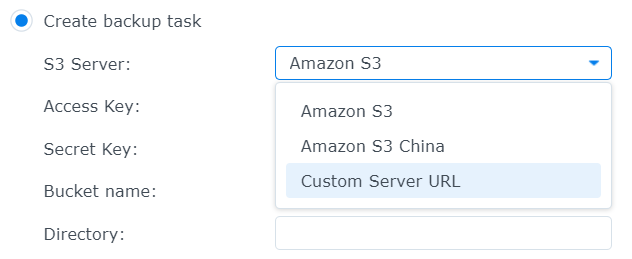
Scroll down to Cloud Service and select S3 Storage then click Next.
Select Custom Server URL
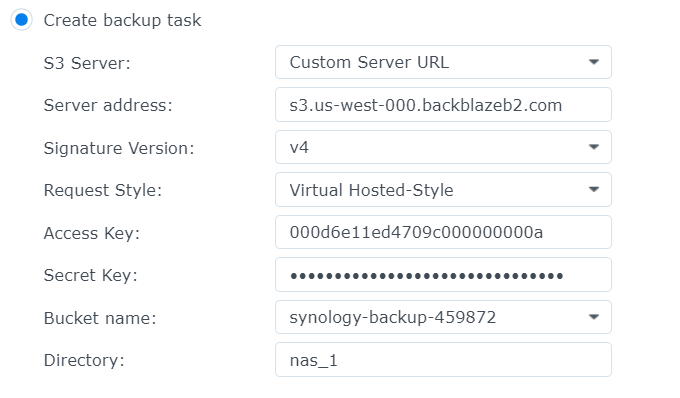
Open the buckets page in Backblaze.
Copy the endpoint from the bucket you created above.
Use the bucket settings below and click Next
S3 Server: Custom Server URL
Server Address: Endpoint copied from bucket settings
Signature Version: v4
Access Key: keyID value from the Backblaze application key
Secret Key: applicationKey value from the Backblaze application key
Bucket Name: Select the bucket you created earlier. This may take some time to load the first time you click the dropdown. If you don't see buckets on this dropdown check if the application key has permissions to list all buckets.
Directory: This value will autofill. You can change it if you want.
Select the shares you want to backup and click Next. Add any Synology apps and click next.
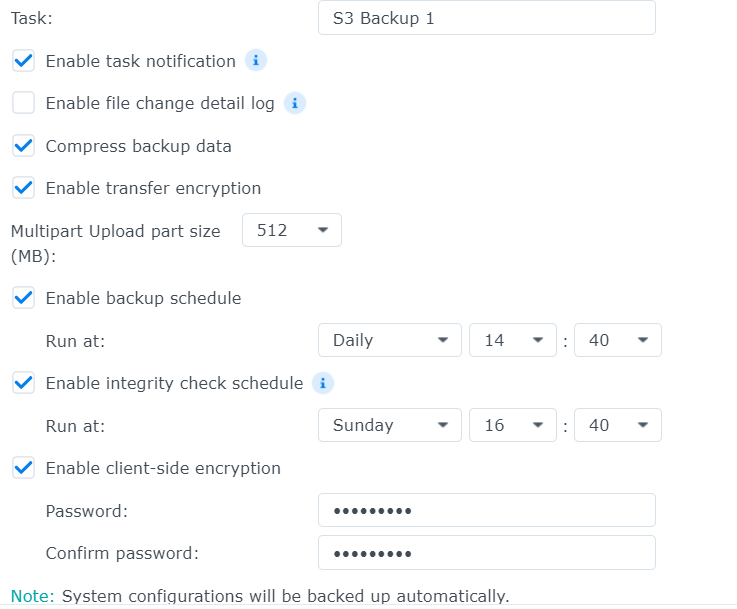
Change the task name and schedule if needed.
Check Enable client-side encryption to encrypt the backups. This is optional but highly recommended.
Do not lose this password! There is no way to recover it through Synology or Backblaze.
Click Next and Yes after reading the warning if you enabled encryption.
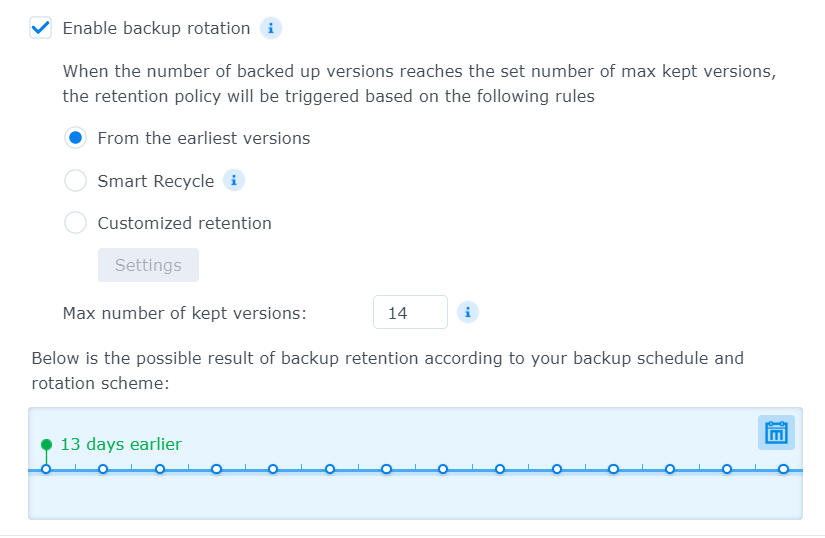
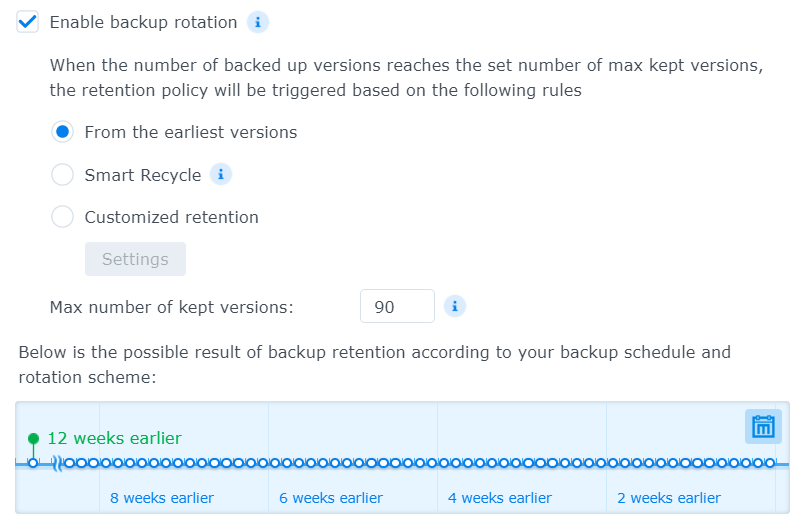
Set the backup rotation for the backup task.
I set this to 14 days for Backblaze to lower costs. My main goal for this task is to have a second offsite backup. I use another local backup task with higher retention as my primary backup.
Keep in mind you are changing the number of versions and not days with this setting.
EX: If you're not running backups daily, using "7" would not mean a week.
Click Next. Review the settings and click Done if everything looks good.
This will take a minute to load. You will be prompted to download a .pem file if you enabled encryption.
Do not lose this .pem file. You will need it or the password to restore files.
USB Setup
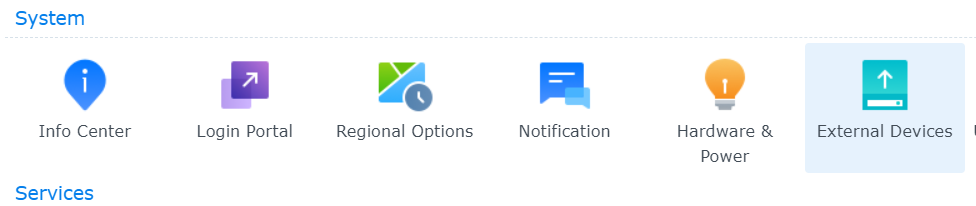
Open Control Panel in Synology DSM. Go to System > External Devices.
You can use any USB port on the NAS. The USB drive needs to be formatted with a supported filesystem.
I didn't want to format my real backup drive for this post so I'm using a USB HDD adapter with an old drive. This might be a cheaper route if you have any spare drives.
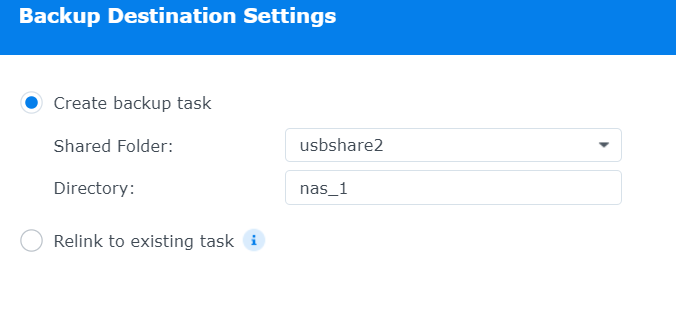
The USB drive will mount to "usbshare1" by default. I'm using "usbshare2" in this example because I have another drive connected.
Open Hyper Backup. Click the + button to add a new backup job.
Select the backup type. This example is using Folders and Packages.
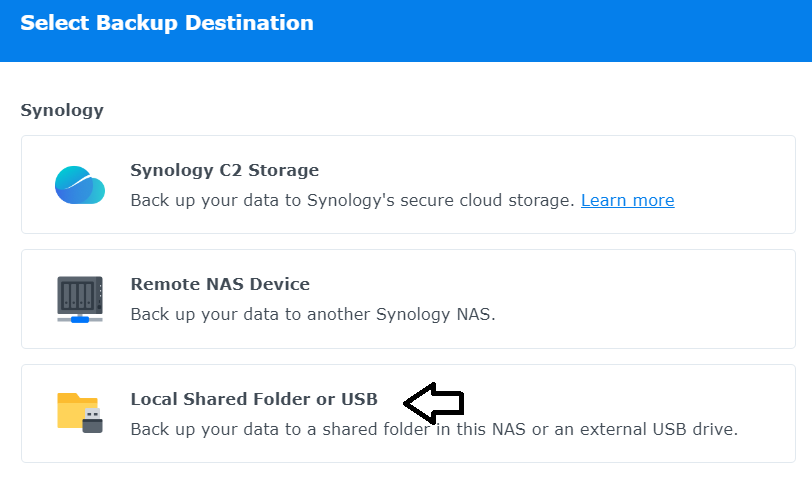
Select Local Shared Folder or USB in Hyper Backup then click Next.
Select Single or Multiple versions. If you want backups with versioning use Multiple versions.
Select the USB share under Shared Folder.
The directory name will auto-populate. You can change this if you want.
Add the shares and Synology apps you want to include in the backup.
Change the task name and schedule if needed.
Check Enable client-side encryption to encrypt the backups. This is optional but highly recommended.
Do not lose this password! There is no way to recover it.
Click Next and Yes after reading the warning if you enabled encryption.
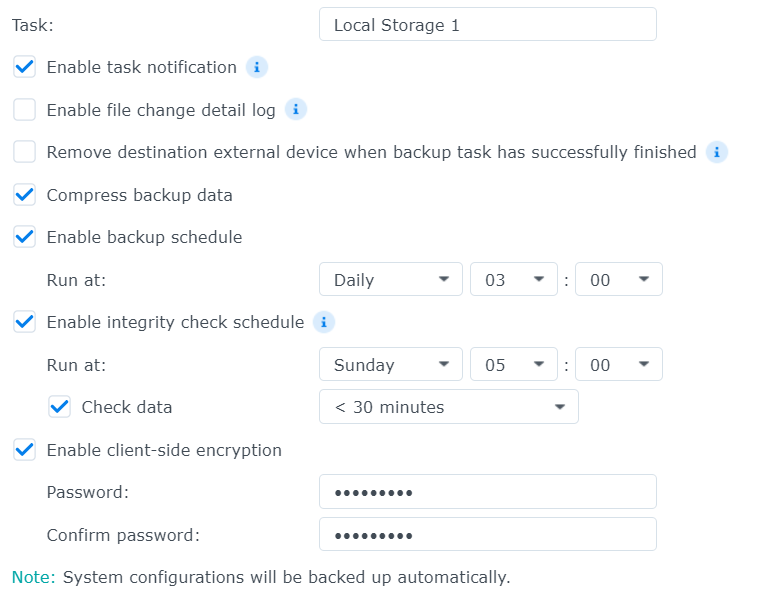
Set the backup rotation for the backup task.
Keep in mind you are changing the number of versions and not days with this setting.
EX: If you're not running backups daily, using "7" would not mean a week.
Click Next. Review the settings and click Done if everything looks good.
This will take a minute to load. You will be prompted to download a .pem file if you enabled encryption.
Do not lose this .pem file. You will need it or the password to restore files.
Notifications
Make sure to setup email in Control Panel > System > Notification.
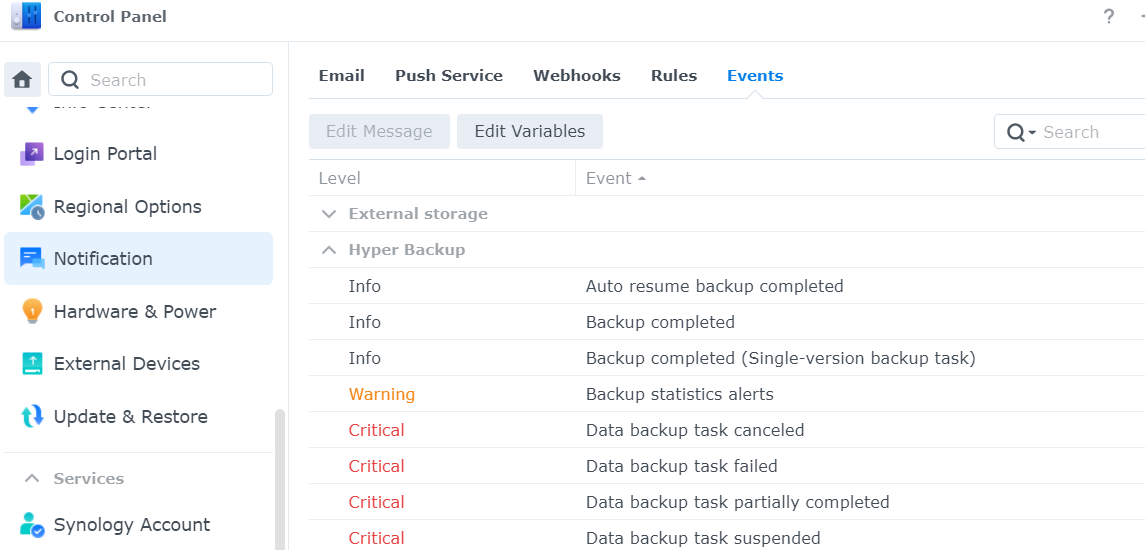
You can check email alerts for Hyper Backup under the Events tab
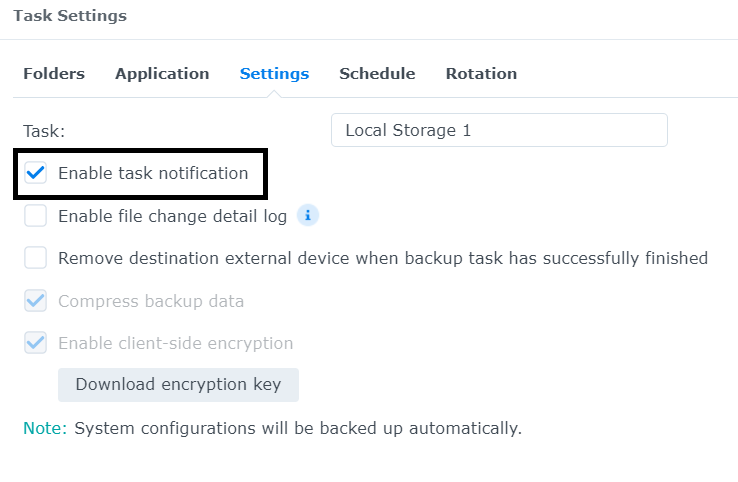
You can enable/disable tasks notification under the Settings tab in the job settings