Connecting the radio
Open the Radiooddity CPS and connect the radio to your computer.
Make sure the downloads linked above are for the correct model and version of your radio!
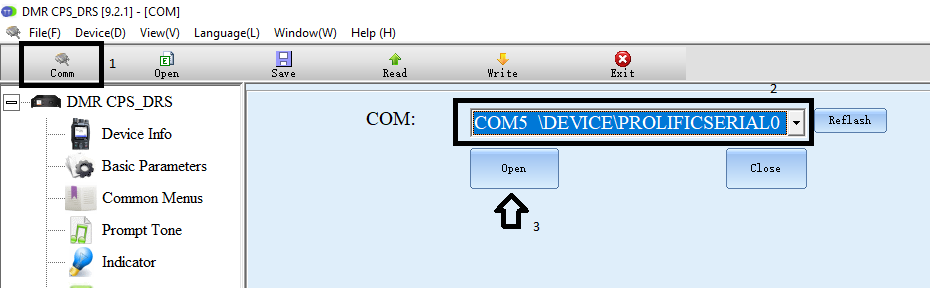
Click the COM button in the top left corner (1) then select the COM port from the list (2) and click Open (3) to connect the radio.
Finding the COM port
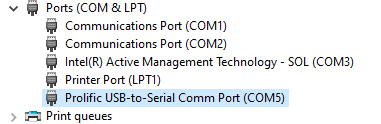
You can find the COM port by going to device manager (Windows Key + R > devmgmt.msc) and checking the devices under Ports (COM & LPT).
devmgmt.msc
Click the Read button to read the config from the radio.
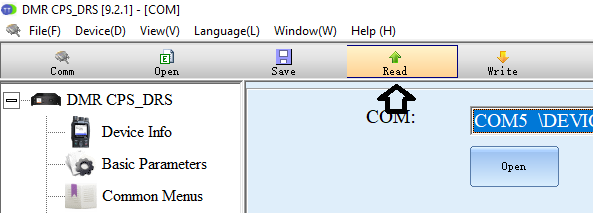
Your radio may chirp when you click read. You'll see a reading bar while this is running.
![]()
Saving options
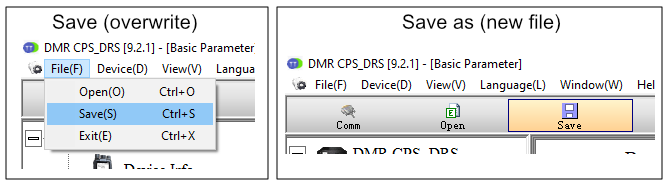
It's a good idea to save the config from the radio before making any changes. There are two ways to save in the software.
File > Save will save (and overwrite) the file you have open.
The Save button will open a prompt which will let you save the config as a new file.
APRS Settings
Enable GPS
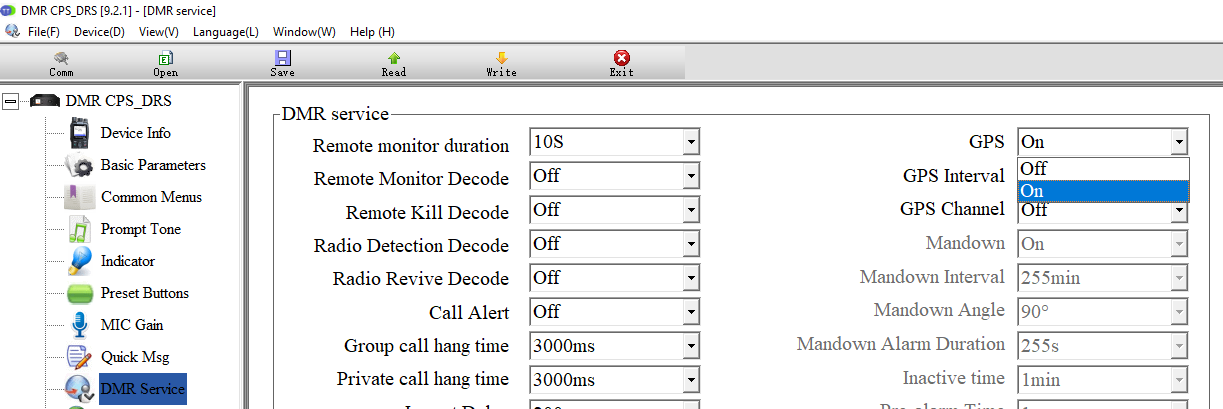
Select DMR Service from the left menu.
Change GPS to On and adjust the GPS interval if needed.
This step needs to be done when using GPS with analog APRS.
APRS Settings
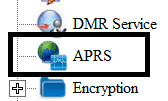
Select APRS from the left menu.
Change Beacon to GPS Location.
![]()
Change Your Call Sign (red "1" in the screenshot below) to your call sign. Do not add an SSID.
The Your SSID (green "2") setting may need to be changed depending on where you're using the radio.
See this link for a list SSID recommendations.
The APRS Map Icon symbol (orange "3") will change the icon that will appear on the map.
See this link for a table of icons.
Change Your Sending Text (blue "4") to the message you'd like to send.
Set TX Freq to your region's frequency.
Here's a link to the frequency image from aprs.org
North America is 144.390

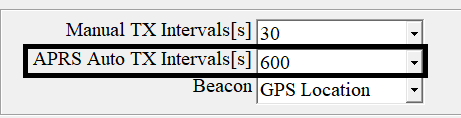
You may want to set the APRS Auto TX Interval higher when you're done testing so you're not sending too frequently.
Open your zones in left menu under Zones[Channel]
My zone is called HOME, yours might be different.
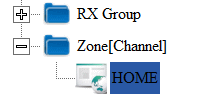
Select a channel with CH Mode set to analog and scroll to the right.
Click APRS and select APRS(A) for analog APRS.
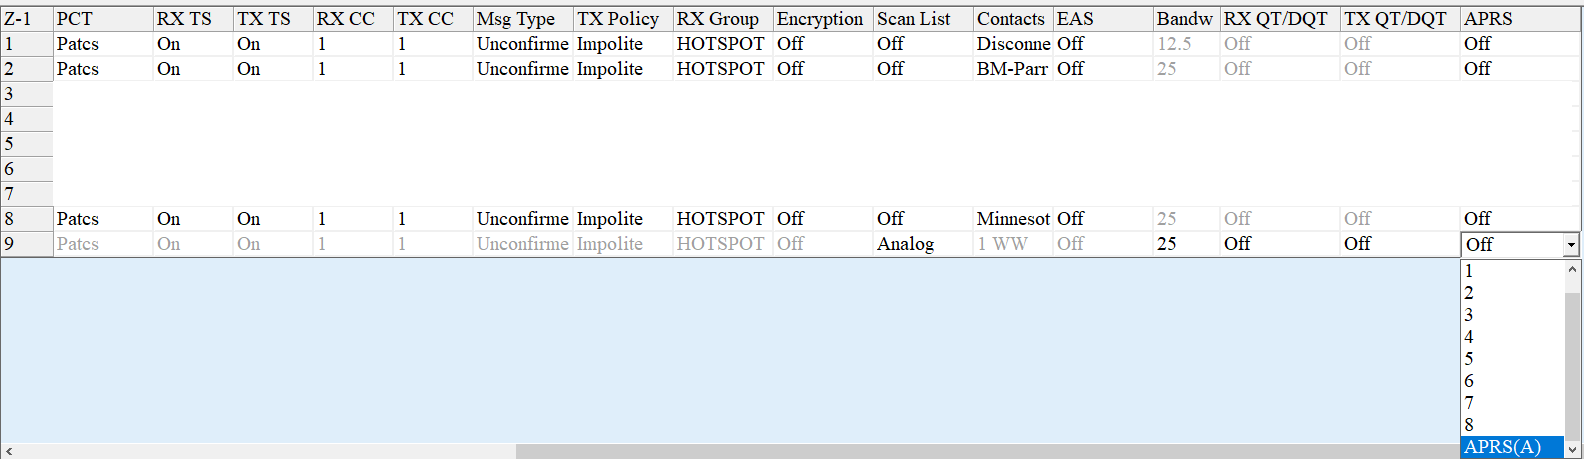
You must have this channel selected to send APRS data.
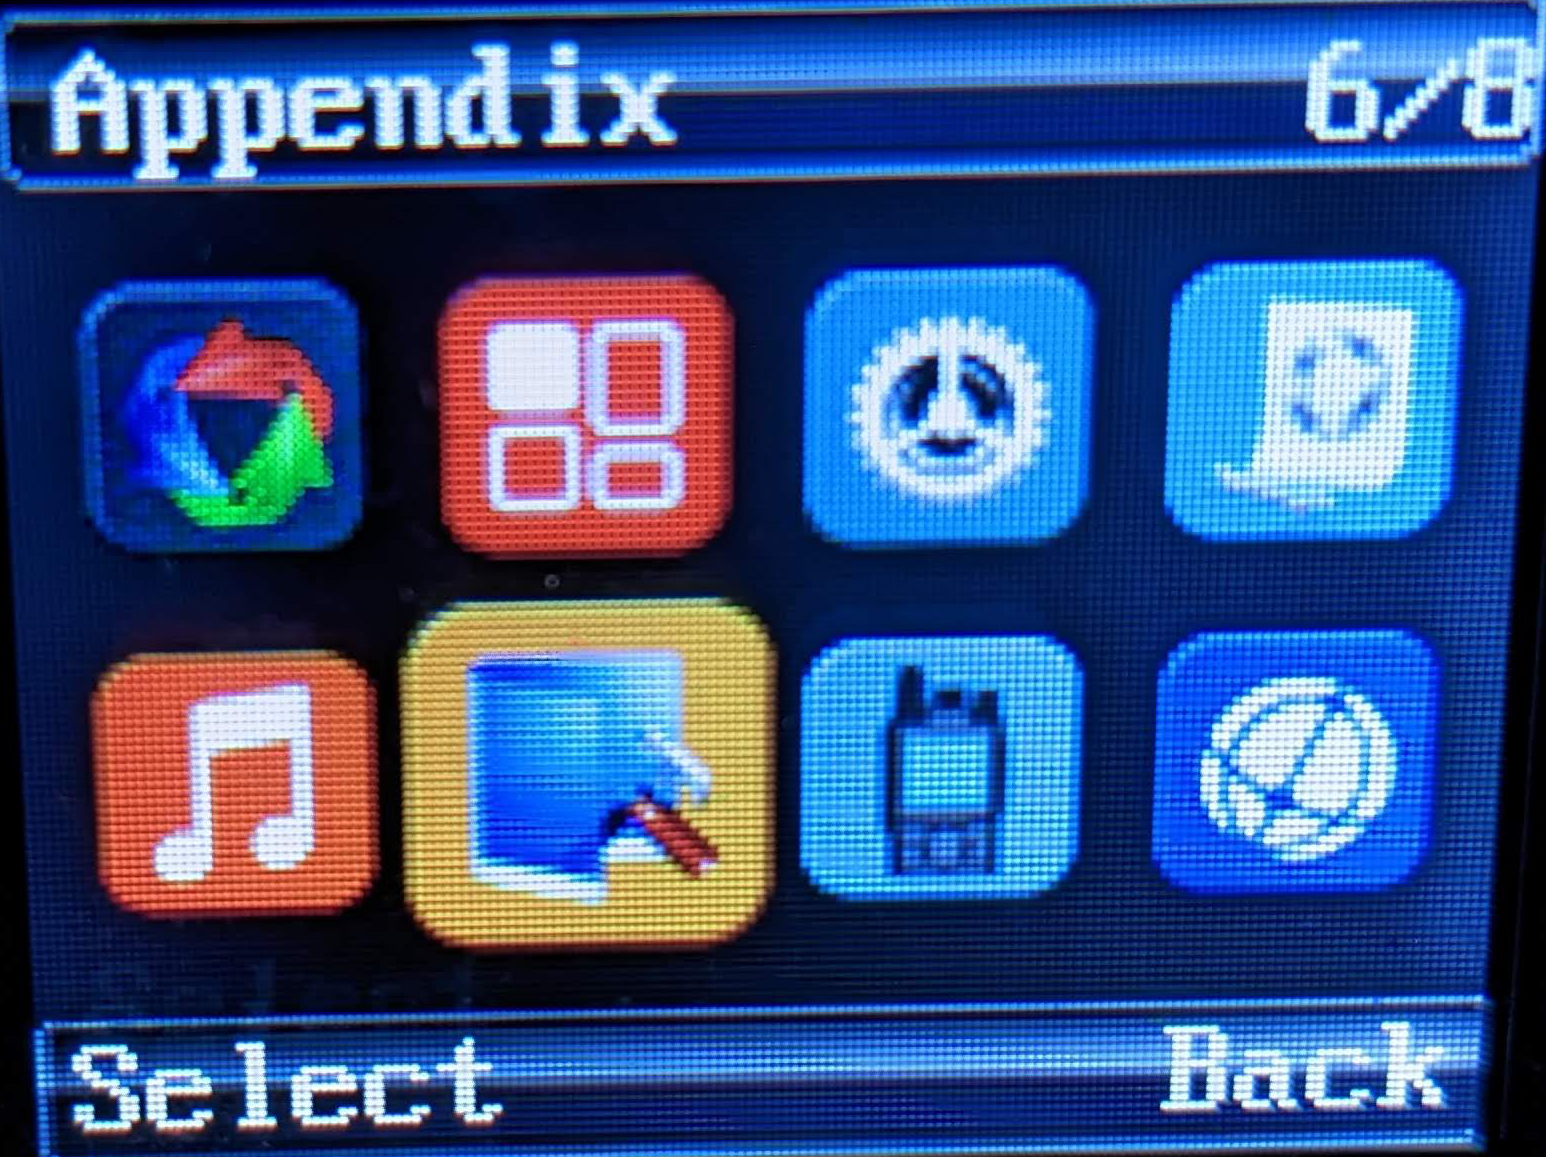
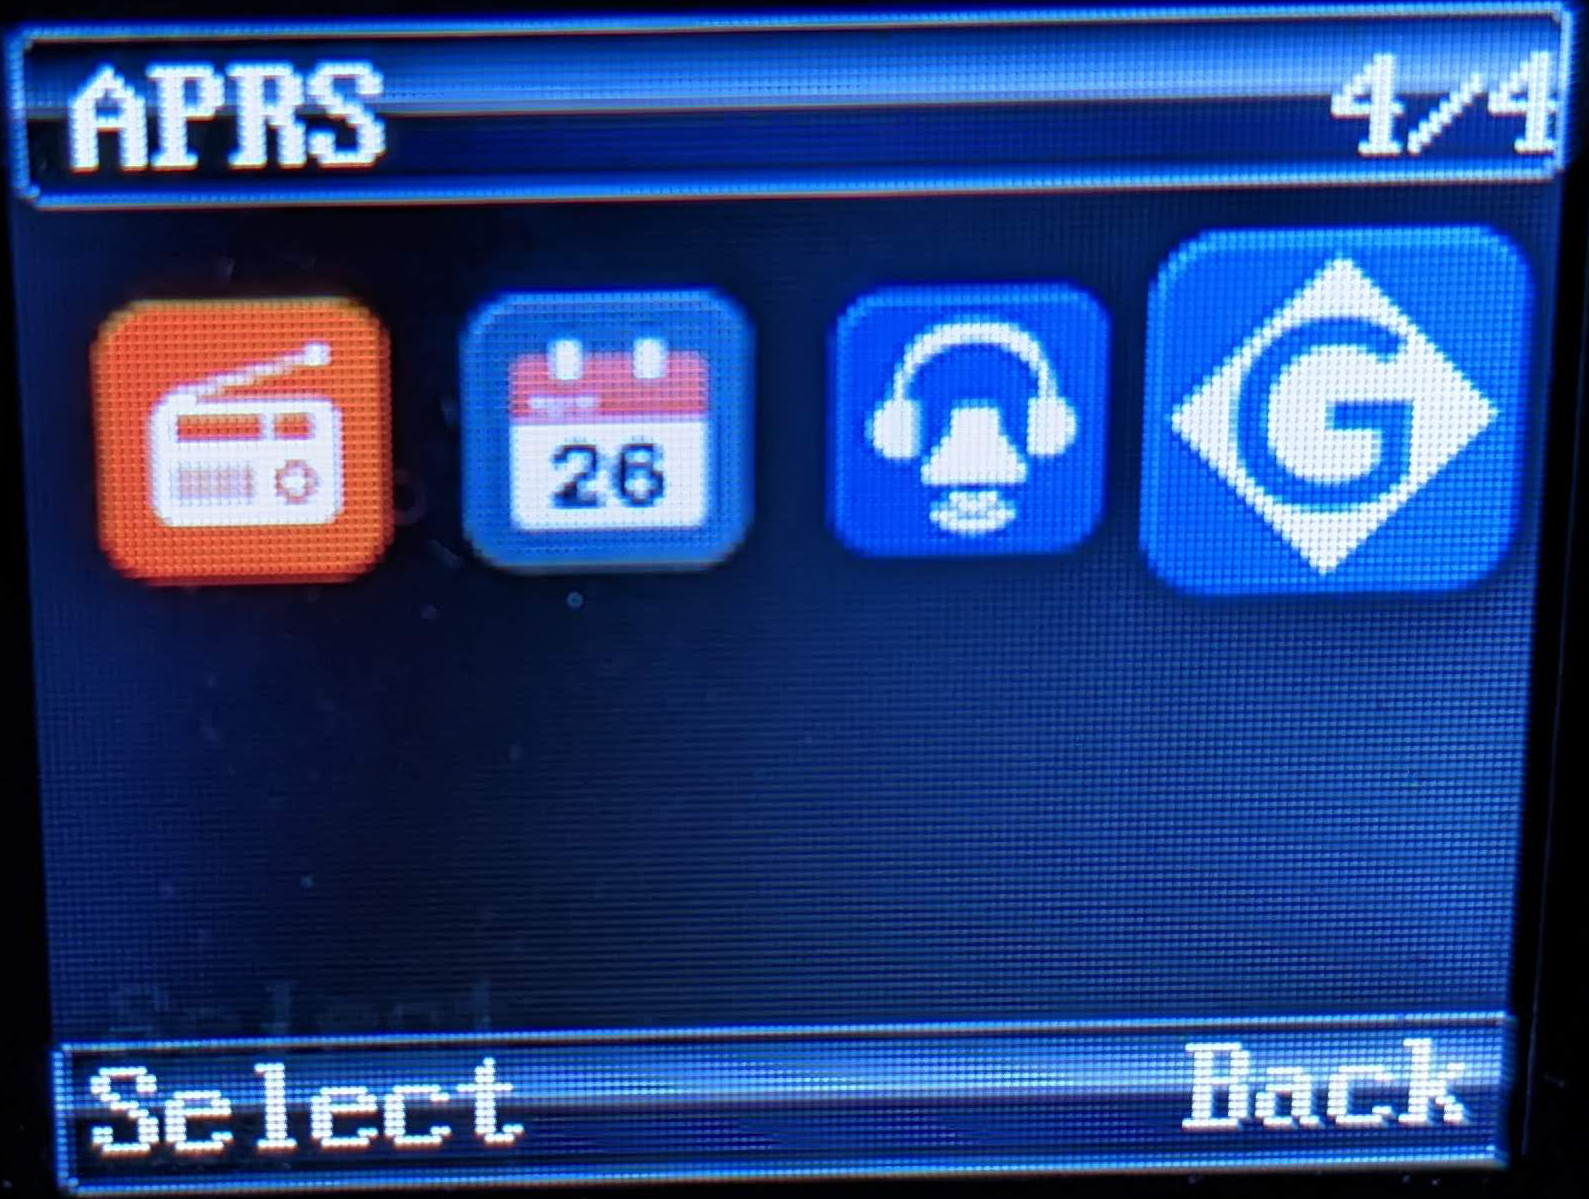
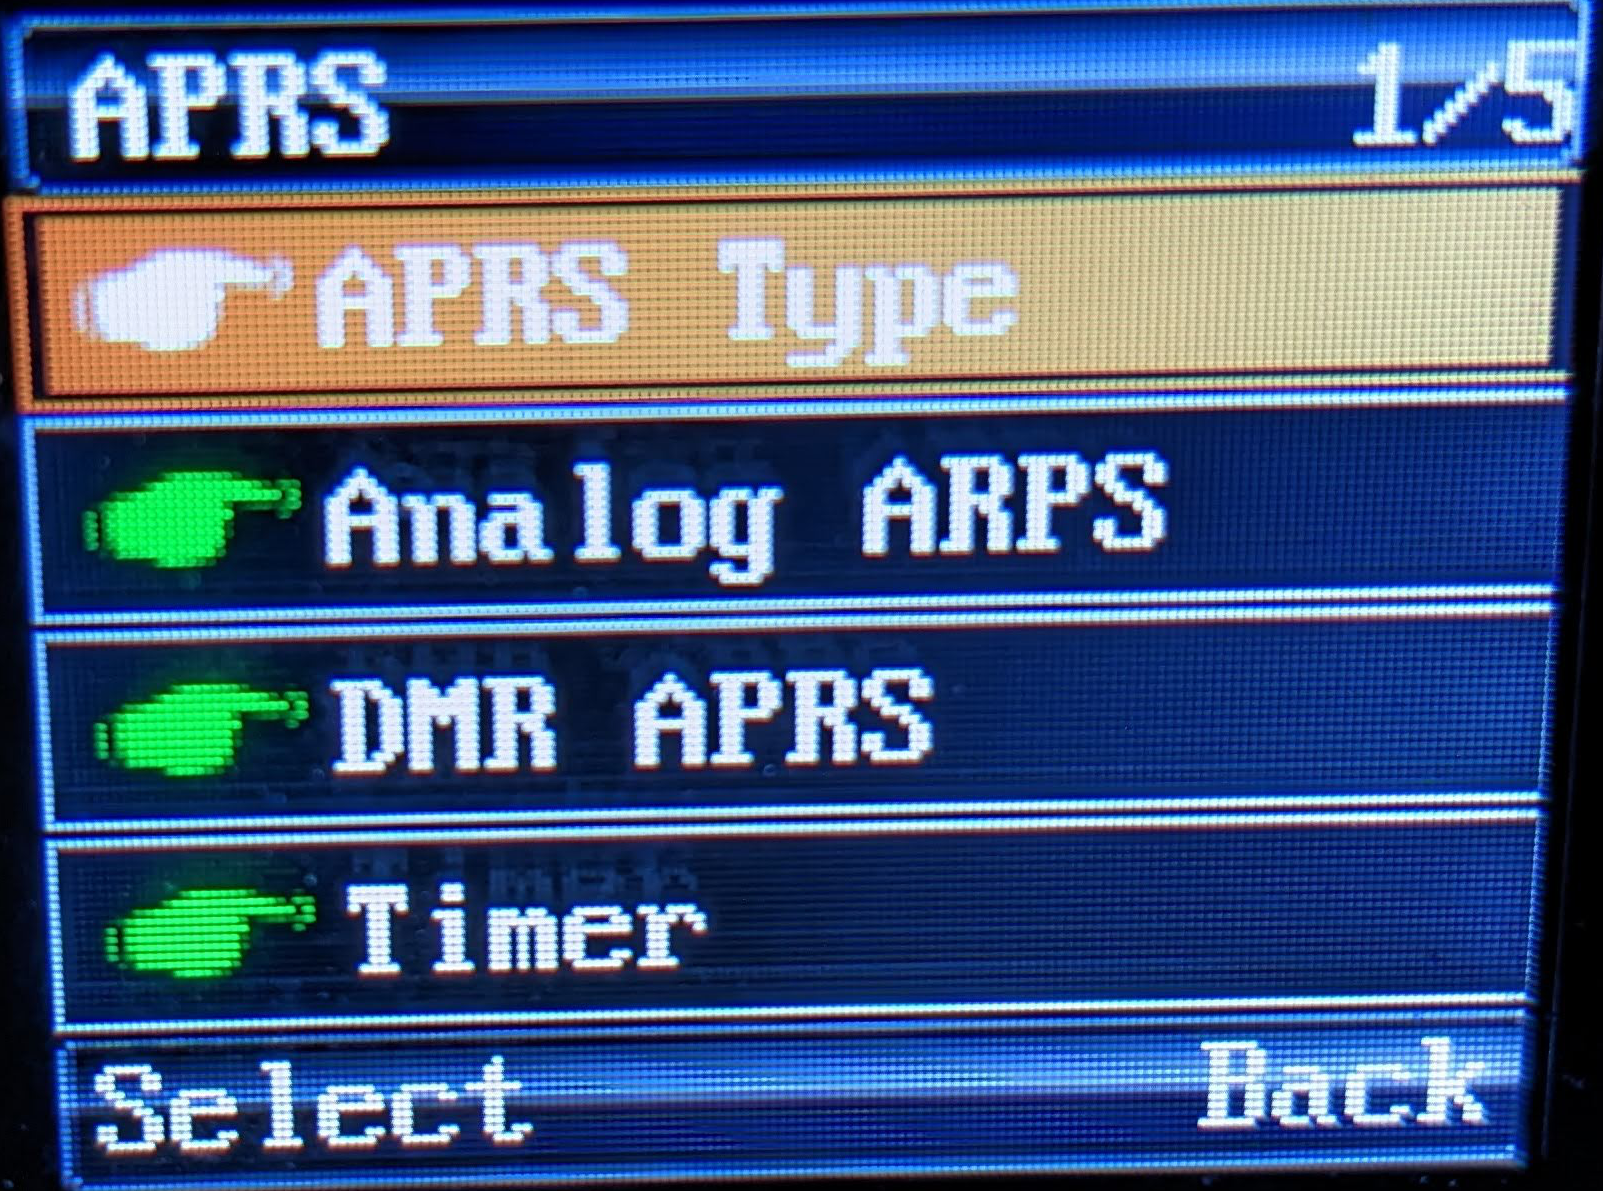
Setting APRS on radio
You can enable or change APRS modes on the radio by pressing the knob to open the menu then select
appendix > APRS > APRS Type > select type (below)
Analog APS
DMR ARPS
DMR+Analog ARPS
Write to radio
Save your config (see saving options above) and click the Write button to write the config to the radio.

Testing APRS
You may need to turn the radio off and back on for GPS to start.
The red symbol in the middle of the screen means GPS is enabled but inactive.
![]()
It will turn green when GPS is active.
![]()
You will see a flag icon in the top bar when you have a channel selected with APRS enabled.
It may take longer than the APRS Auto TX Interval to send the packet. The Transmit Delay and Prewave Time settings can also add delays to the APRS interval.
You can search for your callsign at aprs.fi to check if you're being heard by nearby stations.
Search the raw packets page to check for errors if everything looks correct on your radio. You may have an incorrect icon or map symbol.
Happy APRSing
73 de KF0IZW