This post covers moving VMs from ESXi to Proxmox. In theory it should also work for other hypervisors.
You will need a system with access to both the ESXi and Proxmox datastores. I'm using a NAS with two NFS shares in this example.
I'd recommend using separate shares. Proxmox will create default directories which could make it harder to navigate and cleanup.
I'm using these datastores in the steps below:
ESXI: /mnt/NASDatastore
Proxmox: /mnt/PVEDatastore
See this post for steps on adding a Synology share to the Proxmox host with NFS.
Short Version
Create a new VM with a disk
Convert the vmdk with qemu-img (Linux) or StarWind’s v2v converter
qemu-img convert -p -f vmdk -O qcow2 /path/to/<source-vm>.vmdk /path/to/PVEDatastore/images/<VM ID>/vm.qcow2
Open /etc/pve/qemu-server/<VM ID>.conf on Proxmox node
Add unused#: <storage node>:<VM ID>/<virtual disk filename>
Detach temp disk from VM
Attach converted disk to VM
Change boot order in VM
Preparing VMs
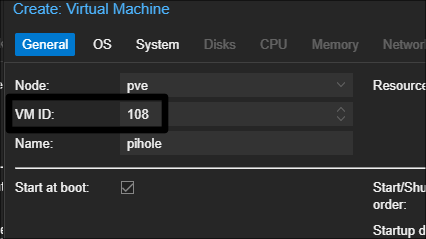
Create a new VM in Proxmox. Note the VM ID for later. The VM ID is 108 in this example.
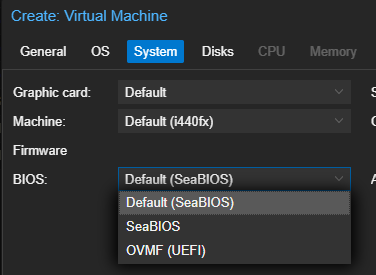
Match the BIOS type of the old VM.
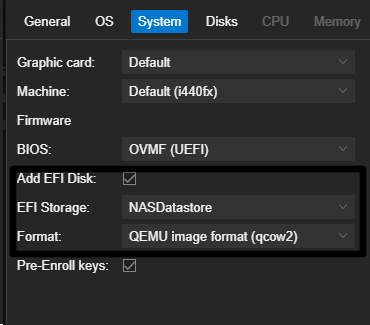
Create an EFI disk if you're using UEFI and enable TPM if needed.
Create a temporary disk with the new VM. This is a placeholder and can be 1-2GB.
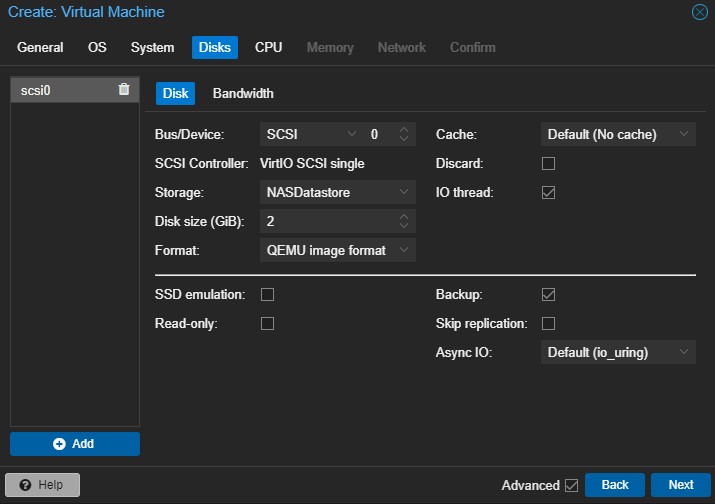
Match the other settings (CPU, memory, etc.) to the old VM. Leave Start after created unchecked.
If the guest is running Windows you'll need to install the VirtIO Drivers (and optionally virtio-win-guest-tools) before converting the virtual disk. Here's a link to the VirtIO .iso.
Make sure to reboot for the install before shutting down the VM to convert the virtual disk.
Cleanup any snapshots on the ESXi VM before converting.
Converting virtual disk
Linux
I'm using Ubuntu 22.04 in this example. You can use any distro that supports QEMU.
You could use the Proxmox host if the ESXi datastore share is mounted on the host.
Install qemu-utils with sudo apt install qemu-utils.
If you're mounting the ESXi datastore with NFS you'll also need nfs-common.
sudo apt update && sudo apt install qemu-utils -y
Run qemu-img convert -p -f vmdk -O qcow2 /path/to/esxi/vm.vmdk /path/to/PVEDatastore/images/<VM ID>/vm.qcow2 to convert the virtual disk.
qemu-img convert -p -f vmdk -O qcow2 /
convert: convert disk
-p: Show progress
-f: Input virtual disk's format
-O: Output virtual disk's format. This is a capital O. Lowercase o is a different command.
See the qemu-img man page for more details
qemu-img will try to detect the input virtual disk type if you don't specify one.
I'm using sudo here because of permissions on the datastores. You may not need to use sudo depending on your setup.
Use the .vmdk file for the input. Not the -flat.vmdk file.
The converted .qcow2 virtual disk must be in the /images/<VM ID> directory in the datastore. You move it to this location after converting if needed.
There are some exceptions to the virtual disk location but if you already know that then you probably don't need this guide.

Once the virtual disk is converted you can attach it to the VM
Windows
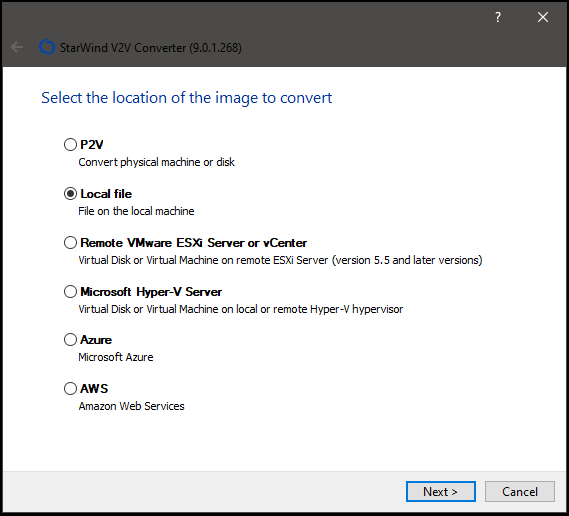
You can use StarWind’s v2v converter to convert the vmdk to qcow2. You'll need to use a valid email address to download the converter.
I'm not associated with StarWind and have no idea what they do with your information. I've used it for a few years now without issues. Never had a single sales call/email.
Select Local file for the image to convert.
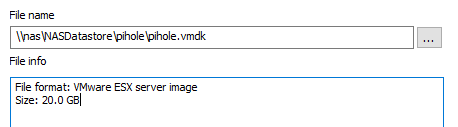
Browse to the old VM's .vmdk. Select the .vmdk file, not the -flat.vmdk.
You need to click ... to type in a path.
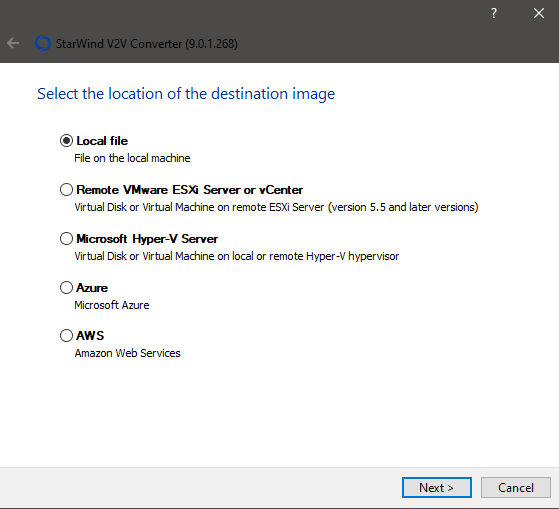
Select Local file for destination
Select QCOW2 for destination format
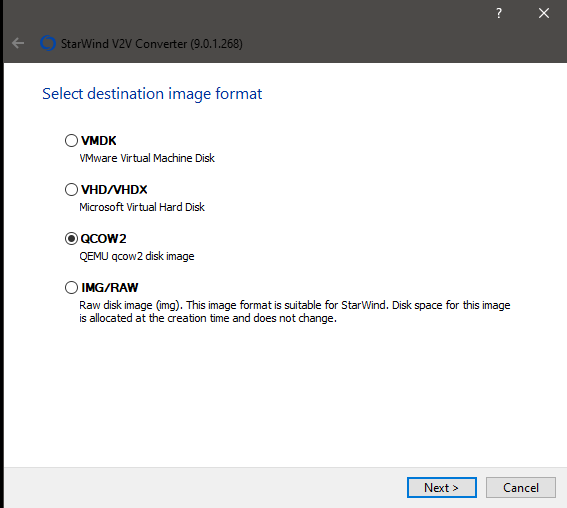
Use \path\to\PVEDatastore\images\<VM ID>\vm.qcow2 for destination
The converted .qcow2 virtual disk must be in the /images/<VM ID> directory in the datastore. You can move it to this location after converting if needed.
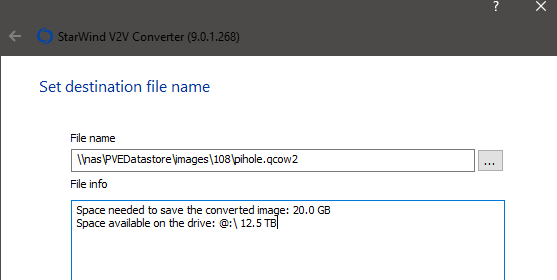
You may need to re-thin the disk after converting with StarWind v2v.
Attaching the virtual disk
SSH to your Proxmox node
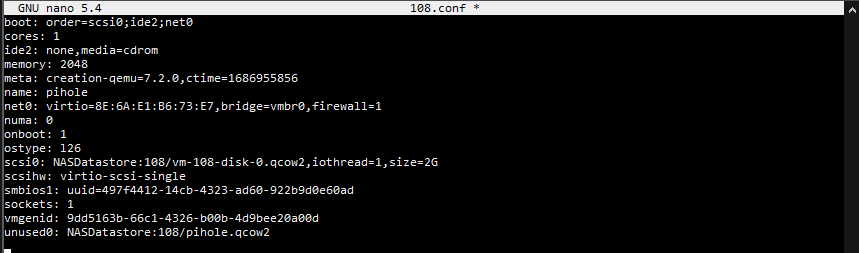
Open the new VM's config file at /etc/pve/qemu-server/<VM ID>.conf with nano or your favorite editor.
nano /etc/pve/qemu-server/
Scroll to the bottom of the file (ctrl+end) and add the converted disk as an unused type with the format below
unused#: <storage node>:<VM ID>/<virtual disk filename>
For example, the storage node (datastore) is called "NASDatastore" on my pve host, the VM ID is 108 and the virtual disk's filename is pihole.qcow2.
unused0: NASDatastore:108/pihole.qcow2
Press + X then y to save then enter to overwrite the .conf file.
Open Proxmox web UI and select the VM then Hardware.
Detach the temp disk created with the VM.
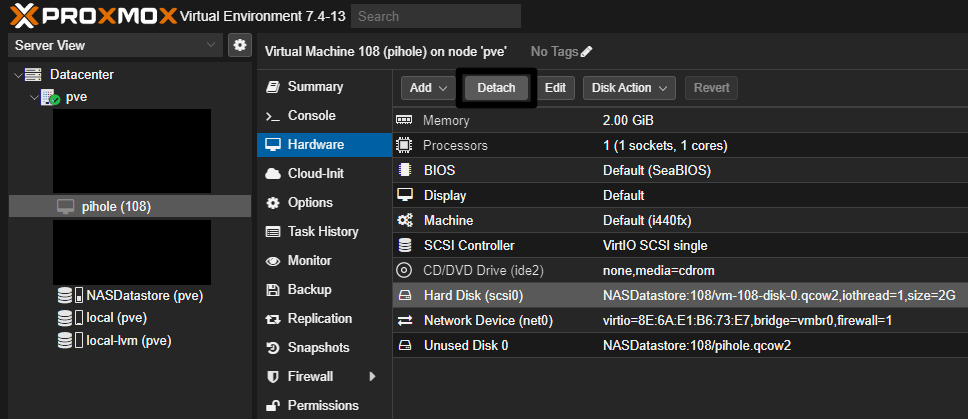
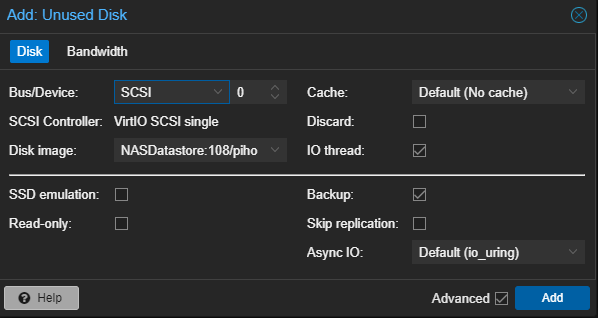
Double click the unused disk added in the config. Change controller type if needed and click OK.
Run qm rescan on the node if you don't see the disk.
qm rescan
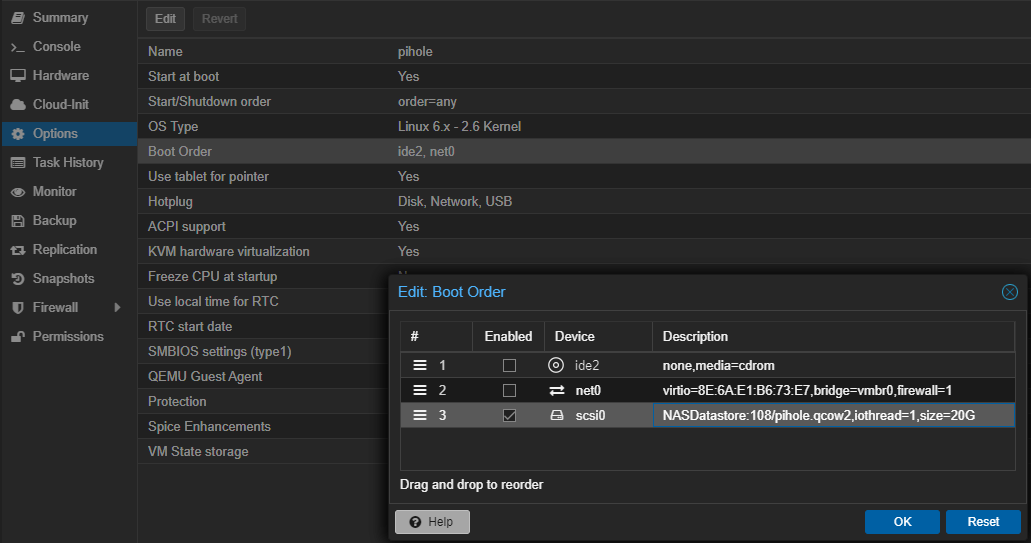
Go to Options > Boot Order > Edit
Check the converted disk. Uncheck or move the other boot options if needed.
Go to Console and boot the VM.
Delete the temp disk created with the VM under VM > Hardware.
You may need to update your NIC settings in Linux guests. See this post for more information.
Guest Agent/Tools
Using the agent is optional. You need to enable the guest agent in the VM settings and install it on the guest.
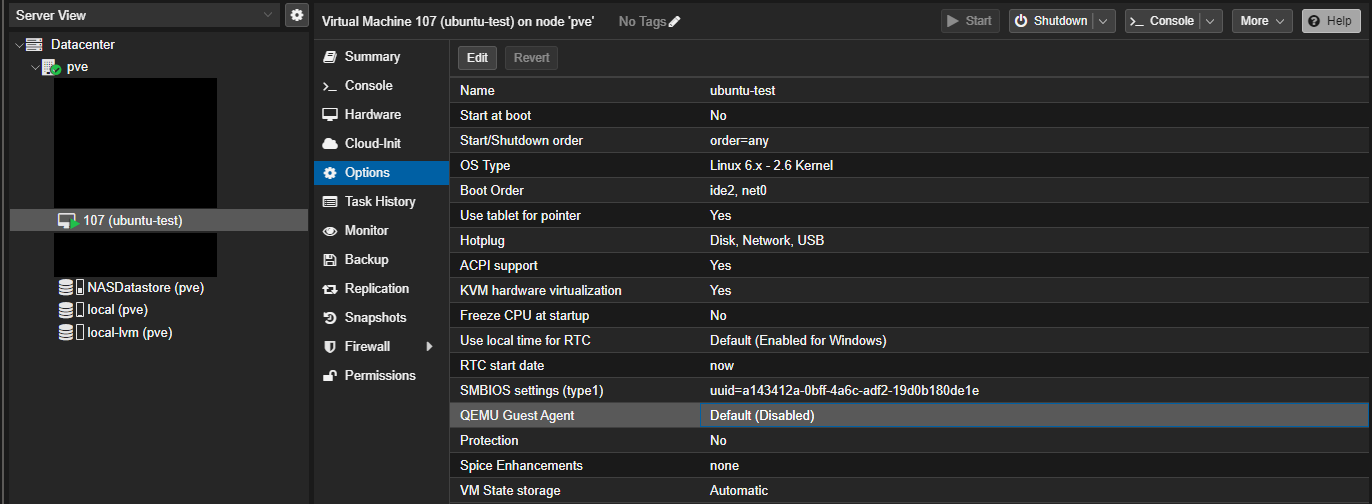
Open the Proxmox web UI. Select the VM > Options > QEMU Guest Agent
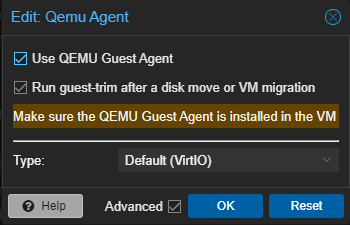
Double click QEMU Guest Agent or click Edit
Enable Use QEMU Guest Agent
The guest-trim setting is optional. See the QEMU Guest Agent page for more details.
The new settings will be in orange text which means they will apply on next boot.
You will need to restart the VM from the web UI (not the guest) for the settings to apply.
![]()
Install the agent on the guest with the steps below.
Linux
Install qemu-guest-agent and reboot.
sudo apt update && sudo apt install qemu-guest-agent -y
Windows
The installer (virtio-win-guest-tools.exe) is in the root of the VirtIO .iso.
The IPs section in the VM summary will show a message if the guest agent is not installed/running.
![]()
Remember to uninstall any old hypervisor software (ex: VMWare tools) from the guest.
Notes
Windows System Repair
A few things to check if you're stuck in a Windows system repair loop
- Is the old VM using BIOS or UEFI?
- Does the old VM have TPM enabled?
- Reinstall VirtIO Drivers and try converting the disk again
Boot order not updating
Check for orange text in the boot order settings. This means the change is pending and will be applied next boot.
![]()
Shutting down VMs
If you're stuck trying to shut down a VM open the console and send a ctrl+alt+del to reset. Mash escape to get in the boot menu. It seems to be more responsive in this menu. Don't keep sending stop tasks. This just adds tasks and makes it worse.
If you already sent a bunch of tasks you can double click the task in the list to open up the task viewer and stop it.
If it's still stuck find the process id with ps aux | grep "/usr/bin/kvm -d <VM ID>". It's the number after root.
root@pve:~# ps aux | grep "/usr/bin/kvm -d 106"
root 130431 0.0 0.0 6372 644 pts/0 S+ 11:39 0:00 grep /usr/bin/kvm -d 106
ps aux | grep "/usr/bin/kvm -d <VM ID>"
Then kill the process ID with kill -9 <process id>
kill -9
My SEO plugin says to include an affiliate link.
When you're done with your old host you could always smash it with a hammer.