This post was made on 03/16/2020 with Synology DSM version 6.2.2-24922 Update 4 and Ubuntu 18.04.4 LTS. This will also work for ESXi and vcenter NAS datastores. Parts of the UI and commands may have changed. Leave a comment below if you notice any changes or issues.
Synology share setup
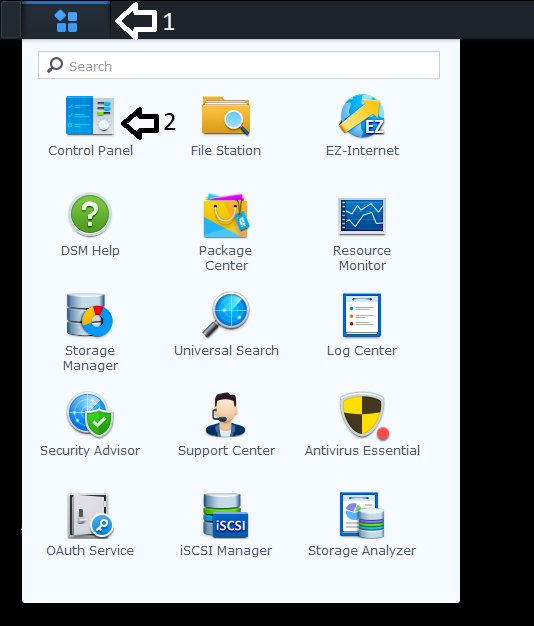
Log into the Synology DSM page (https://<synology ip>:5001/) and open Control Panel.
Select Shared Folder and Create or Edit a share.

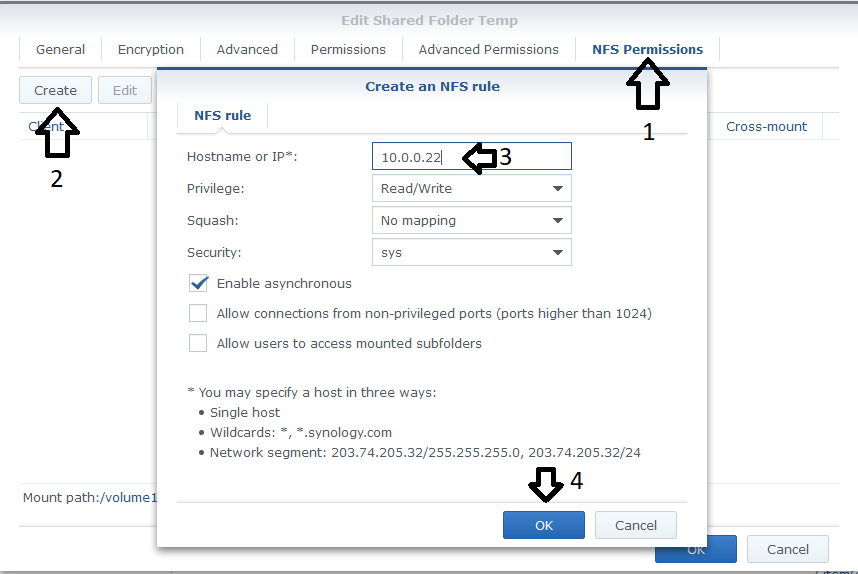
Switch to the NFS Permissions tab and click Create. Enter the IP of the system that needs access to the NFS share. Leave the default options and click OK.
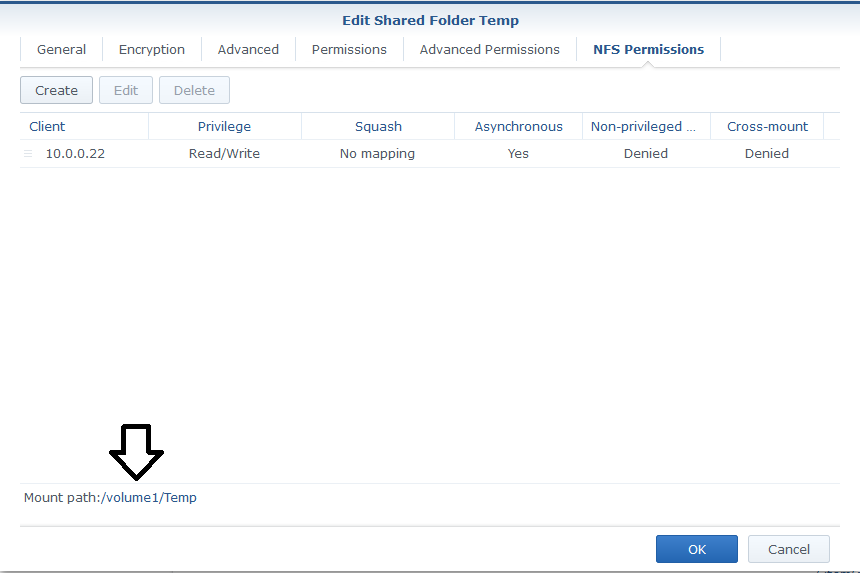
Take a note of the mount path at the bottom of the Edit Shared Folder window. You will need this path when mounting the share later. Click OK and log out of Synology DSM.
Mounting the share in Ubuntu
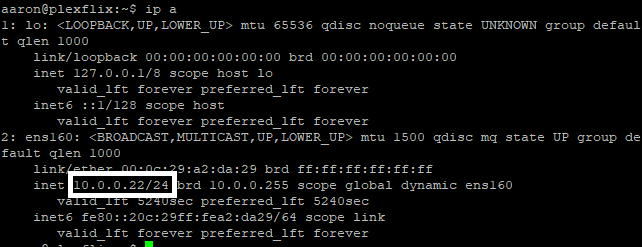
Open a terminal window or SSH to the system. Verify that the system's IP is the same IP used in the NFS rule settings above.
Your interface names might be different.
ip a
Install NFS common tools.
sudo apt-get update
sudo apt-get install nfs-common -y
Create the directory where the share will be mounted. You can put this anywhere. Here's a good video by DorianDotSlash on linux file system/structure while we're on the topic. I'm using /nfs/temp-share for this share. The -p in the mkdir command below will create intermediate directories.
sudo mkdir -p /nfs/temp-share
Temp mount
Mount the share's mount path from the Synology share setup step with sudo mount <Synology-ip>:/<share mount path>. In this example I will be mounting the /volume1/Temp share hosted by the Synology NAS (IP:10.0.0.10) to /nfs/temp-share. Paths are case sensitive.
sudo mount 10.0.0.10:/volume1/Temp /nfs/temp-share
Persistent mount
Mounting with the command above will not stay after a reboot. If you need the mount to stay after a reboot you'll need to add it to /etc/fstab.
Optional: If you already mounted the share using the command above you can unmount it with umount.
sudo umount /nfs/temp-share
Open /etc/fstab with nano or your preferred text editor.
sudo nano /etc/fstab
Add the share's mount path from the Synology share setup step to the bottom of the file using the line below. You can skip to the code block if you don't care how it works.
In this example I will be mounting the /volume1/Temp share hosted by the Synology NAS (IP:10.0.0.10) to /nfs/temp-share. The next two values set the filesystem and mounting options.
The line below will use nfs for the filesystem with default (rw, suid, dev, exec, auto, nouser, async) mounting options. This is a network share so I'm using 0 for dump which will tell the dump backup utility to ignore this filesystem and 0 for pass which will tell fsck to ignore checking this filesystem. Here's a link to the Ubuntu wiki article on fstab mounting options if you need to use different settings.
Paths are case sensitive. Use tabs for spacing between values.
10.0.0.10:/volume1/Temp /nfs/temp-share nfs defaults 0 0
Close the text editor (ctrl+x in nano) and save changes if prompted.
Testing file permissions
You'll probably need to give yourself and/or a group ownership and write access on the mount directory. You can use user:group or user:user if you do not need to give a group access. The -R on the chown command is recursive. If this is an empty share you probably won't need it.
sudo chown -R user:group /nfs/temp-share
I used chmod 755 for file permissions in this example. You may want to use a different value depending on what you're doing with your share and server. Here's a link to another website with a simple comparison of 700 vs 755 and another link to the Ubuntu wiki article on file permissions if you want more information.
sudo chmod -R 755 /nfs/temp-share
You can check permissions with stat
stat /nfs/temp-share
You can test write permissions by touching a new file
touch /nfs/temp-share/test
That's it. Now fill it with linux distros.
Mouning the share in ESXi/vcenter
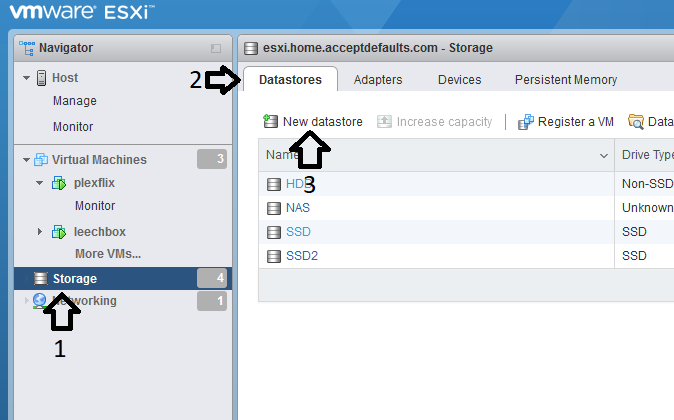
Log into the host's web interface. Go to Storage and select the Datastores tab. Click New datastore.
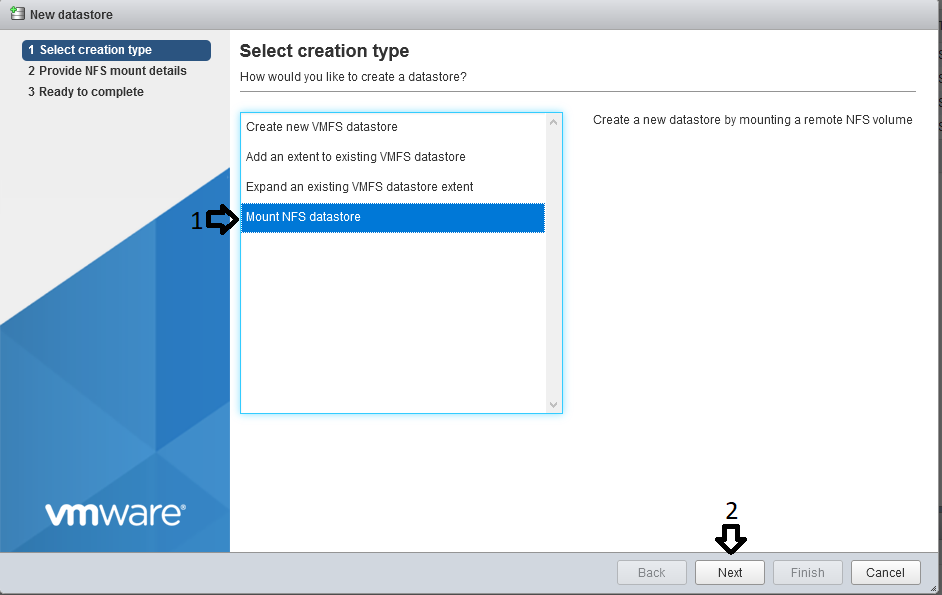
Select Mount NFS datastore and click Next.
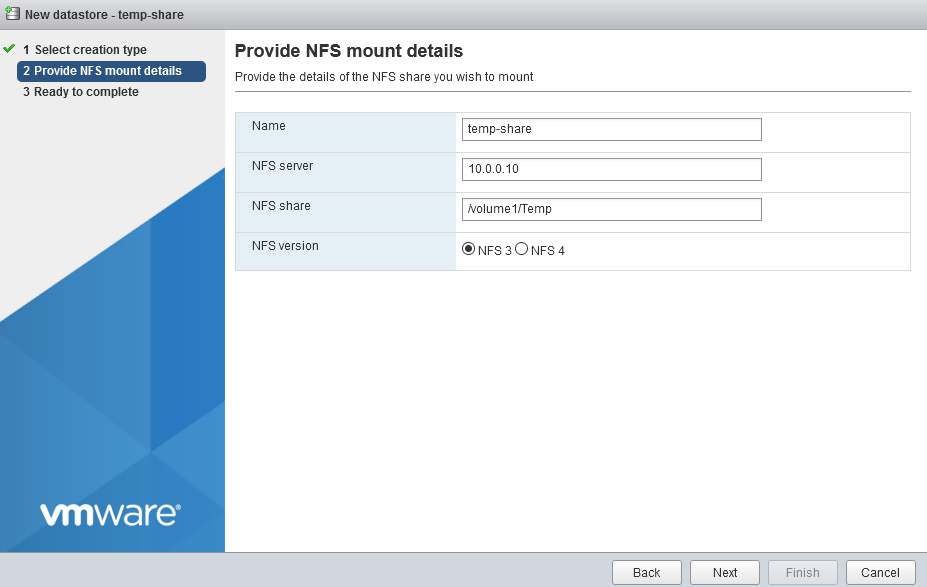
Enter the NFS mount details (see below) and click OK. Verify the NFS mount details on the next screen and click Finish.
In this example I will be mounting the /volume1/Temp share hosted by the Synology NAS (IP:10.0.0.10) to /nfs/temp-share. Paths are case sensitive.
- Name - Name of the datastore in ESXi/vcenter
- NFS server - IP of the server
- NFS share - Share mount path from the Synology share setup step