This post contains Amazon affiliate links.
Short Version
Add talkgroup to Contact list
Add talkgroup to RX Group
Add channel to zone then set contact and RX group for channel.
Requirements
- Radioddity DB25-D
- Programming cable (included with radio)
- Radioddity CPS Programming Software
Setting up the radio
This radio does not include an antenna. You will need an antenna to use this unit even if you're using a hotspot sitting next to the unit. Do not transmit without connecting an antenna. I'm using a Diamond MR77. This radio uses a standard SO-239 connection so most should work.
If you're using this as a base station (at home) you'll also need a power supply to power the unit. I'm using this one from Amazon. These connections are also pretty standard so anything you find should work. This radio does include a lighter adapter.
Downloads
Download the CPS Programming Software (current version is V3.2) from the Radiooddity Download page. Scroll down to MOBILE SERIES and select DB25-D.
You may also need the device driver for programming cable. See Finding the COM port below.
This page includes an up to date version of the user manual for anything not covered in this post.
Finding the COM port
Plug the cable into your computer and open Device Manager (Start > Run > devmgmt.msc).
devmgmt.msc
The programming cable will show as Prolific USB-to-Serial Comm Port if you do not see this device you will need to download and install the driver.
Your COM port number might be different than the screenshot below.

Programming
It's a good idea to save your config after each step if you need to roll back changes or the software crashes.
Device COM port
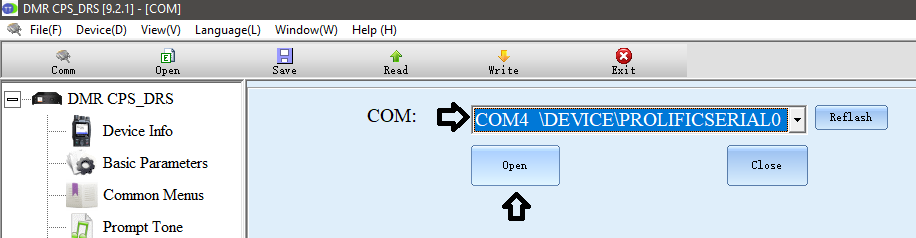
Launch the software and go to Device > Comm (Ctrl+k).

Select the COM port from the Finding the COM port section and click Open.
Reading from radio
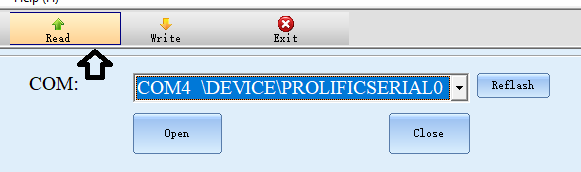
Before making any changes click the Read button to read the config from the radio. You'll hear a beep from the radio and see a "Reading" progress bar.
The number in your progress bar might be different from the screenshot.

Click Save to save the default config. Click Save again to create a second file with a different name. You should have two .F136 files when done.
You can use any name for the configs. I used "stock-config.F136" for the factory default config and "Radioddity-DB25-D-KF0IZW.F136" for my config.
Clicking the save button in the menu will Save As, using File > Save will save the current config.

Go to File > Open and open the second file config (not the default) you created.
Basic Parameters
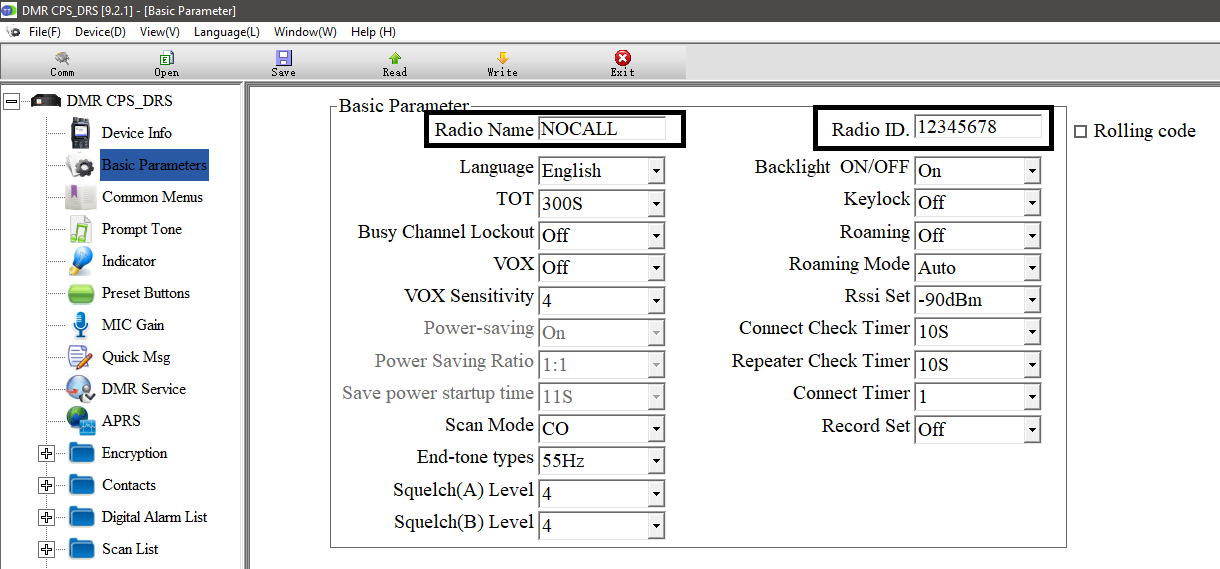
Select Basic Parameters from the list on the left and change the values below.
Radio Name: Your callsign
Radio ID: Your DMR/Radio ID. If you do not have one you can register at RadioID to get one.
TOT: (optional) This is the amount of time before the radio will timeout and stop transmitting. I changed this from 300s to 90s.
Adding Talkgroups
Contact list
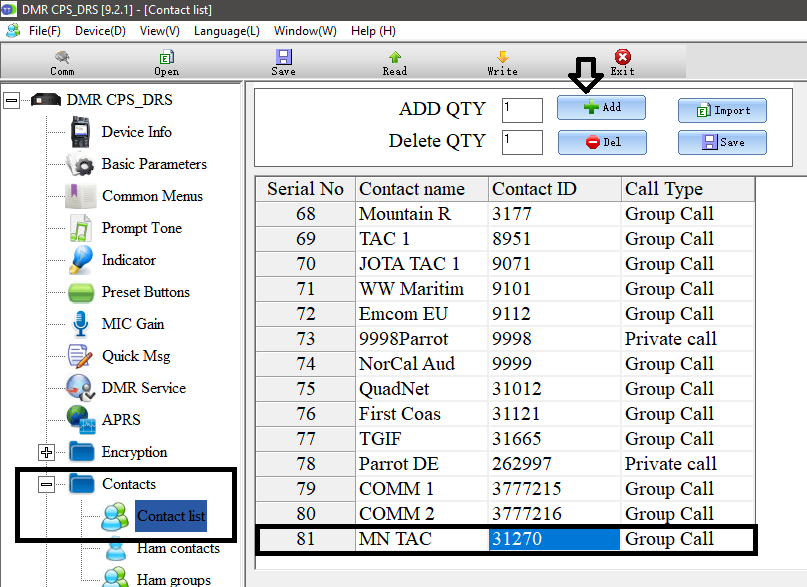
Go to Contacts > Contact List and click Add to add a contact.
Double click Contact name and set a name for the contact. This is for your reference only.
Double click Contact ID and enter the talk group ID.
If you're adding Brandmeister Parrot you will need to change the call type to Private call.
In this example I added the MN TAC (ID 31270) talkgroup.
RX Group
You'll also need to add the contact you just created to the RX group. If you do not add a contact to the RX group you will be able to transmit to the contact and will see a green light when receiving from the contact but you will not hear the audio.
Go to RX Group > RX Group list and select an existing RX Group List or create a new one.
You can create a new RX Group List by selecting empty space under the existing RX Group lists and clicking Add.
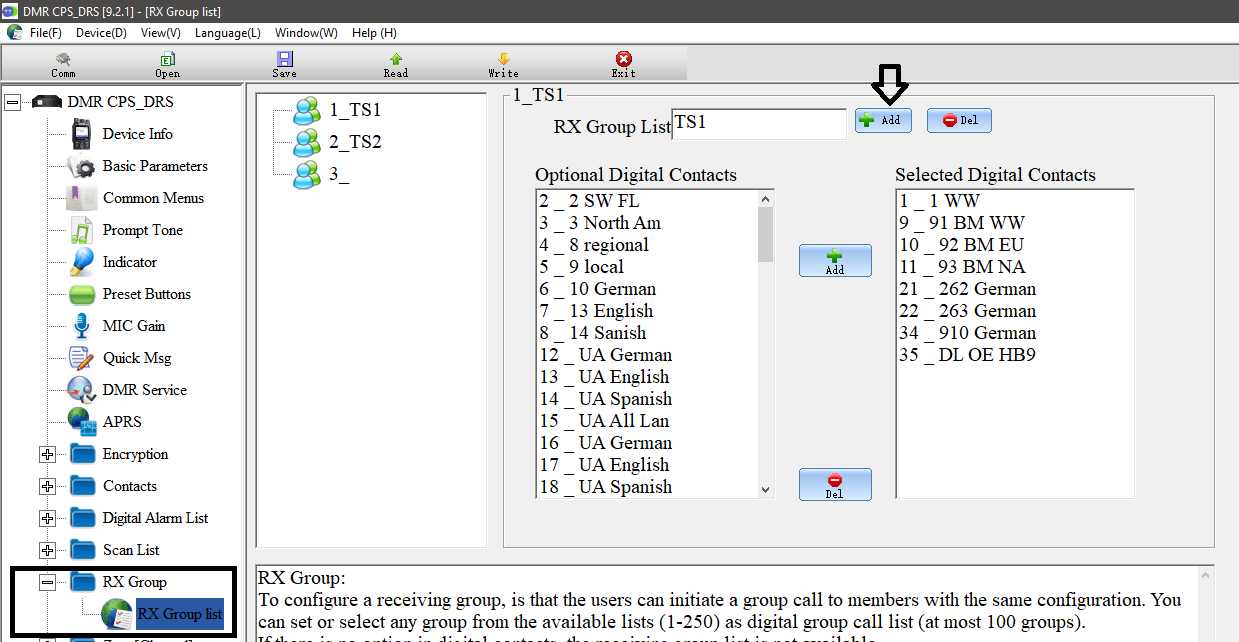
In this screenshot it created the "3_Group3" RX Group. Select the newly created group. You can rename the group by changing the name in the RX Group List field.
Scroll to the bottom of the Optional Digital Contacts box and select the talkgroup contact you created. Click Add to add it to the Selected Digital Contacts list.
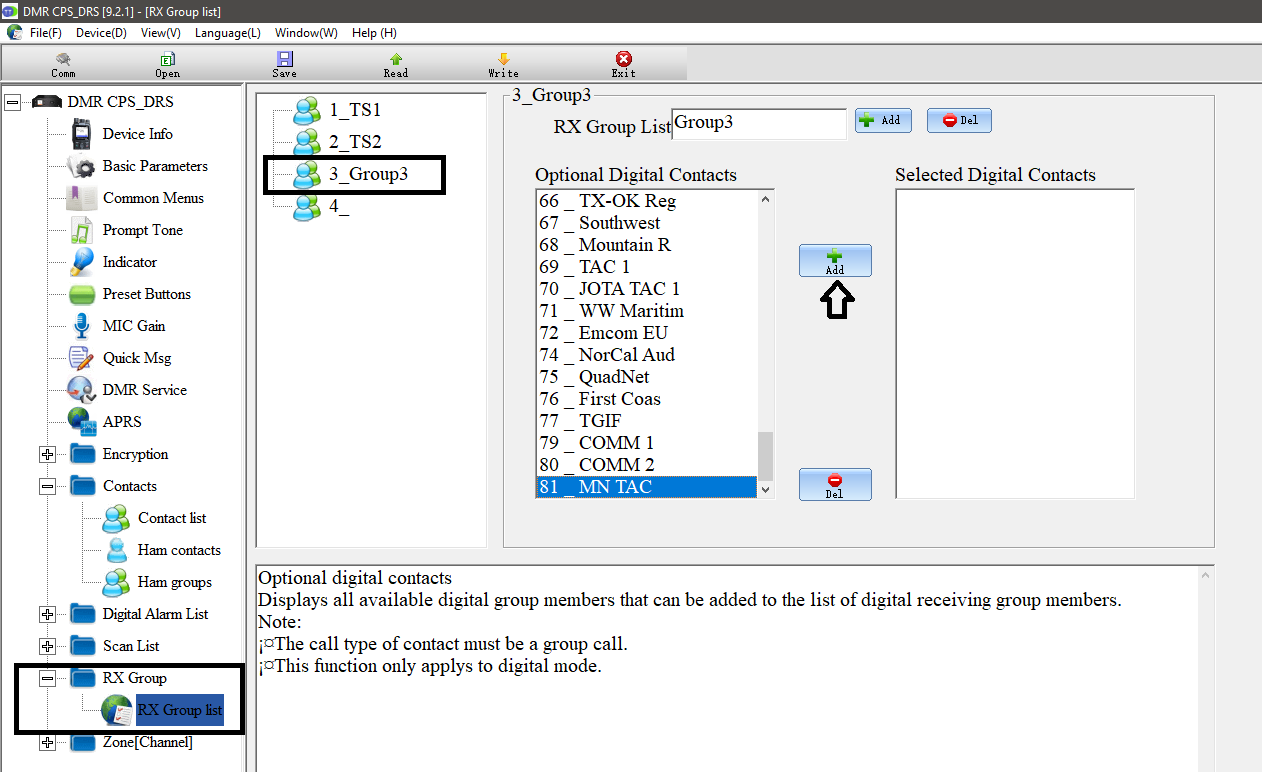
The talkgroup will show in the Select Digital Contacts box after adding it.

Adding to channel
Select Zone[Channel] on the left menu. You can either use an existing zone or create a new one. This part can be buggy. If you don't intend on keeping the defaults zones you should delete them now. I created a new zone named HOTSPOT and left the defaults to make it easier to follow along.
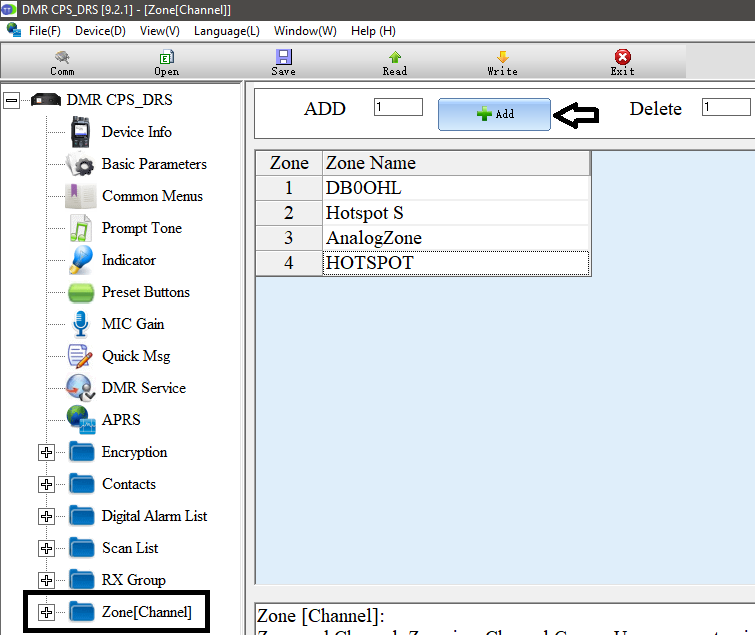
Select the zone you want to use under Zone[Channel] > <zone name>

Select the existing zone or create a new one.
CH mode: Digital
CH Name: Set a name for the channel. This is for your reference only and is the name that will appear on the radio screen.
RX Freq: Receive frequency for the DMR repeater/hotspot.
TX Freq: Transmit frequency for the DMR repeater/hotspot.
Power: Power mode (High/Low) to use for this channel. If you're using a hotspot you can most likely use Low.
Only RX: Receive only mode. This will prevent transmitting on this channel.
Alarm: Show a visual notice when receiving an alarm. I disable this setting.
Prompt: Respond to an alarm call. I disable this setting.
RX CC: Color code for RX channel. This setting will depend on the DMR repeater/hotspot you're using.
TX CC: Color code for TX channel. This setting will depend on the DMR repeater/hotspot you're using.
RX Group: Select the RX Group containing the talkgroup.
Contacts: Select the Contact name of the talkgroup you created in the Contact list step above.

Your settings might be different from the example in the screenshots. This is only to show the RX Group and Contacts fields.
Writing to radio
Save your config and click the Write button to write the config to your radio.
You can do this from any screen. I usually go to the Device > Comm (ctrl+K) page to verify COM port before writing.
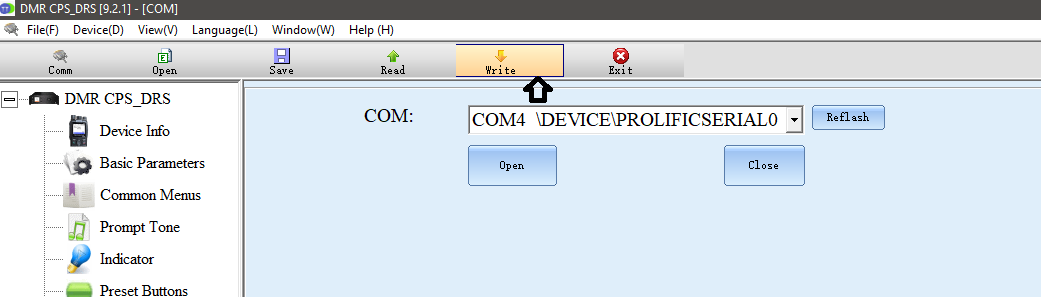
You will see a "Writing" progress bar when it is writing to the radio. After the write is complete your radio will reboot with the new settings.
The number in your progress bar might be different from the screenshot.

Troubleshooting
Not receiving audio
If you can transmit to the talkgroup and see a green light when receiving but do not hear audio the talkgroup may be missing from the RX Group or the channel may not have the correct RX Group assigned.
See the RX Group section for adding the talkgroup to the RX Group.
See the Adding to channel section for assigning the RX Group to the channel.
Data mistake! Error
Check that you're using the correct COM port under Device > COMM (ctrl+K).
I've encountered this error when using a USB extension cable. You might also see the same issue with a USB hub. Try plugging directly into your computer's USB port if possible.
73 de KF0IZW