This post contains Amazon affiliate links.
Short Version
Buy an MMDVM board
Get a DMR Radio ID and BrandMeister account
Download the pi-star image
Change the settings below
What you'll need
- Raspberry Pi
- MMDVM board
- SD Card reader - You can use a USB Card reader if your computer doesn't have one built in.
- Amateur License
- DMR Radio ID
- BrandMeister account - Required to use their network
Hardware
Raspberry Pi
I'm using a CanaKit Raspberry Pi 3 B+. CanaKits are great but I wouldn't recommend them for this project. I had to remove most of the case to fit the MMDVM board.
If you're buying a standalone Pi 3 B+ you will also need a power adapter and SD card.
Pis are expensive right now. You can use most versions of the Pi just make sure it's supported by the MMDVM board you're buying.
C4Labs makes a few cases for Pi 3/4 and Pi Zero Zero/W hotspots. The screen is not required.
Update: The original links for the MMDVM board and C4Labs case are no longer valid. Double check that it will fit your Pi model and MMDVM board.
Here's a new link to an MMDVM board on Amazon.
Accounts
Getting a DMR Radio ID
Register at RadioID to get a DMR Radio ID.
Setting up your BrandMeister Account
Register at BrandMeister Network's website. You'll need a DMR Radio ID before you can register a BrandMeister account.
Next you'll need to create a hotspot password. Once your account has been created click your call sign in the top right corner then the SelfCare button. Passwords must be 20 characters or less and should not include special characters.
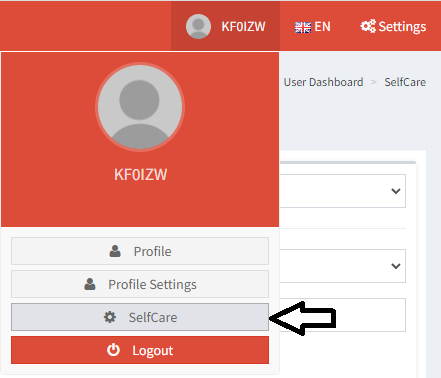
Set a password under Hotspot Security. You will need this later when setting up Pi-Star.
Imaging the Pi
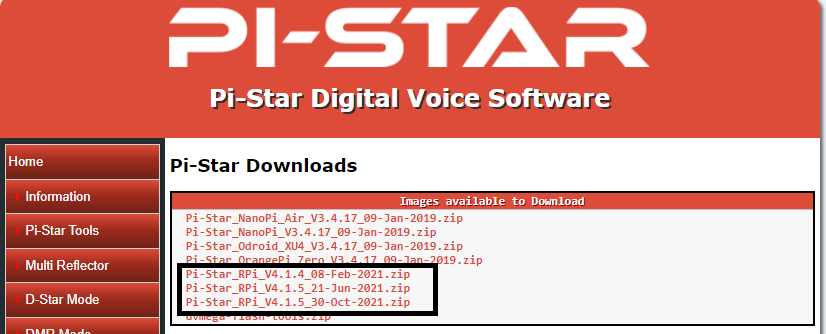
Download the latest image of Pi-Star.
Make sure to download the correct version on Pi-Star's website. I'm using Pi-Star_RPi_V4.1.5_30-Oct-2021.zip.
The version number might be different. The part to look for is "Pi-Star_RPi".
You'll also need software to image the Pi's SD card. The Raspberry Pi Imager will work if you don't already have one.
Extract the .zip downloaded from Pi-Star's website. This should contain an .img and .md5 file.
.img file: used for imaging the SD card in the next step
.md5 file: used to check the file hash of the download
Checking the file hash is optional but recommended. Check this post for more information on checking file hashes.
Unplug any removable storage devices (USB drives, external HDDs, etc.) not currently in use to avoid accidently formatting them.
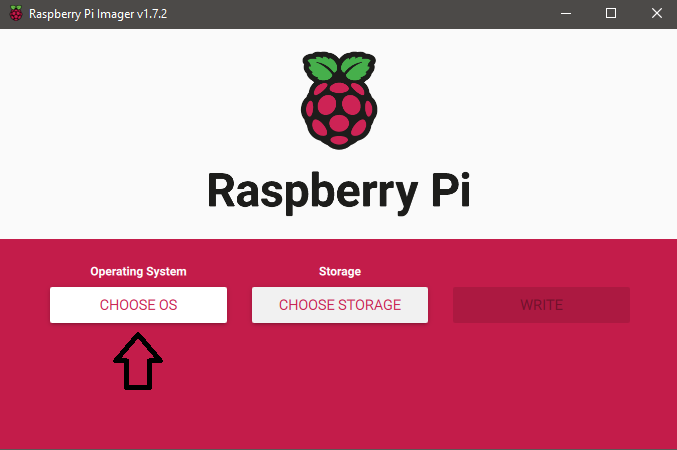
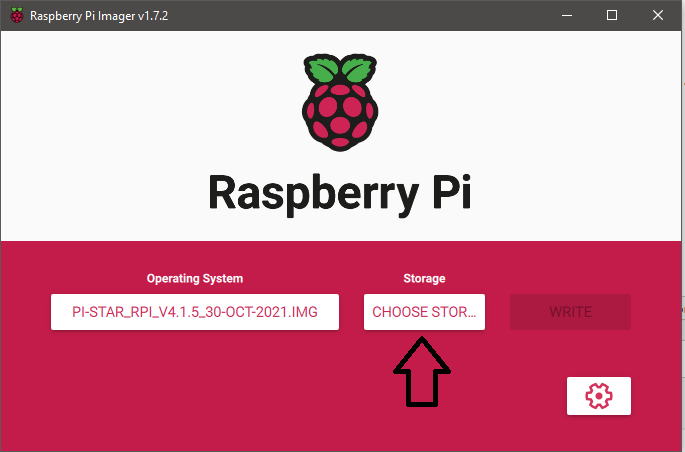
Open the Raspberry Pi Imager and click Choose OS
Scroll to the bottom of the list and click Use custom.
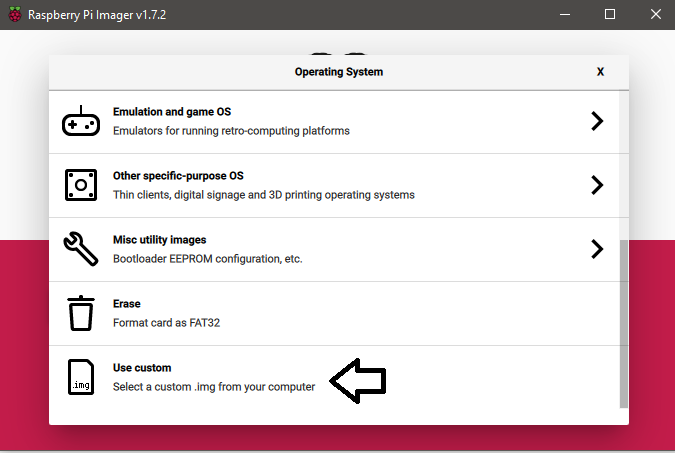
Browse the to .img file extracted above and click Open.
If the .img is on your Desktop or Downloads folder you can click your username on the left then select Desktop/Downloads.
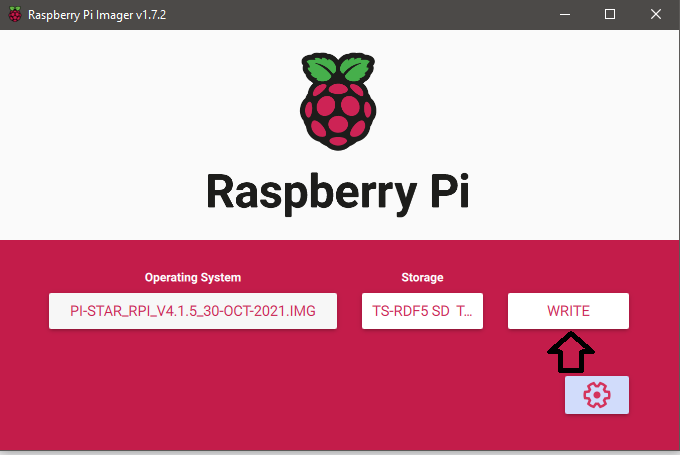
Click the Choose Storage button under storage. Select the SD card.
Make sure you are selecting the SD card if you have multiple devices listed. This will erase all data on the device you select.
Click Write.
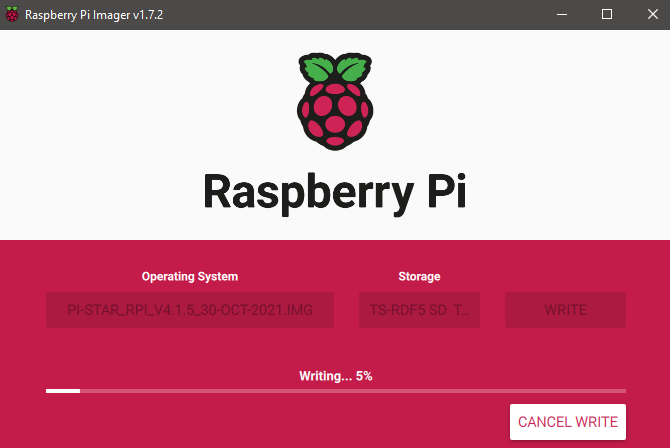
Double check the device name on the warning popup is the SD card and click Yes to write the image.
This step might take some time depending on the speed of your SD card and reader.
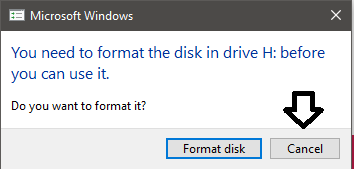
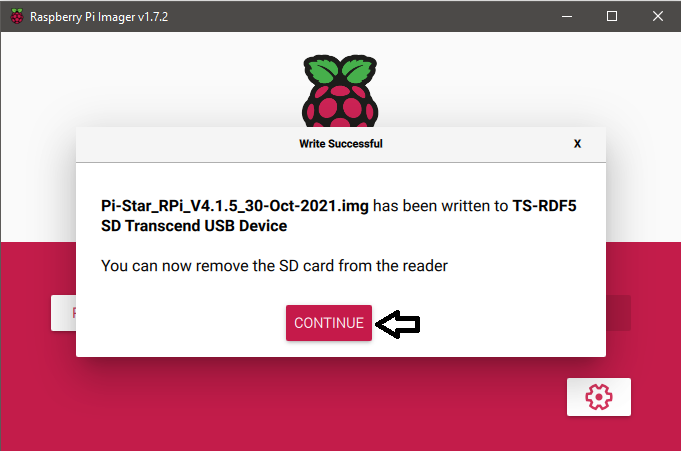
You may see a windows warning to format disks when the imager completes. Close this warning or click Cancel. Do not format the disk.
Click Continue on the Raspberry Pi imager and close it. Remove the SD card from your computer.
Power down the Pi if it's already running. Insert the SD card and plug in the network cable before powering it on.
If you're using a 3+ the SD card slot is on the bottom, opposite side of the USB ports.
Setting up Pi-Star
Booting
The Pi will take a minute to boot and will reboot during the initial setup. You might see some red messages which are safe to ignore.
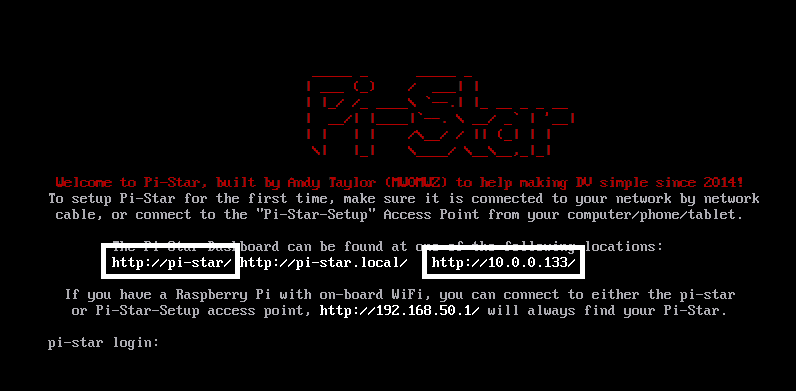
You'll see a Pi-Star login screen with a few web addresses when it's ready.
Open the pi-star web address shown in the login screen or click here. (magic!)
If http://pi-star/admin doesn't work try the IP address. The IP address is the box on the right in the screenshot below. Depending on your network it could be a 10.0.x.x or 192.168.x.x IP address.
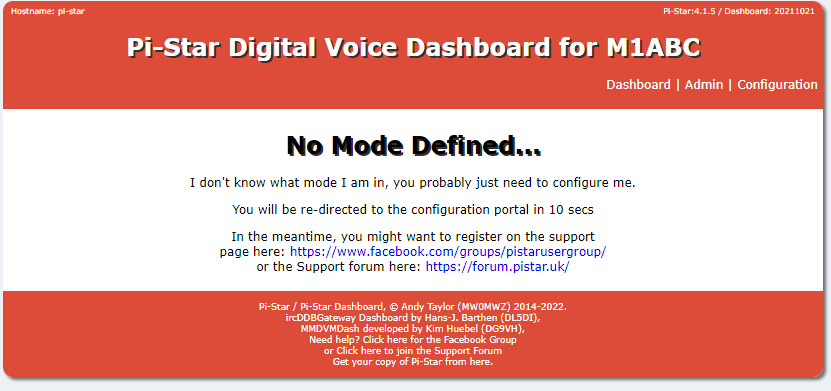
If you see a "No Mode Defined..." page, wait for it to redirect you to the admin portal.
The default login is username pi-star password raspberry.
username
pi-star
password
raspberry

Pi-Star Configuation
The Apply Changes button will only save settings in the table directly above the button.
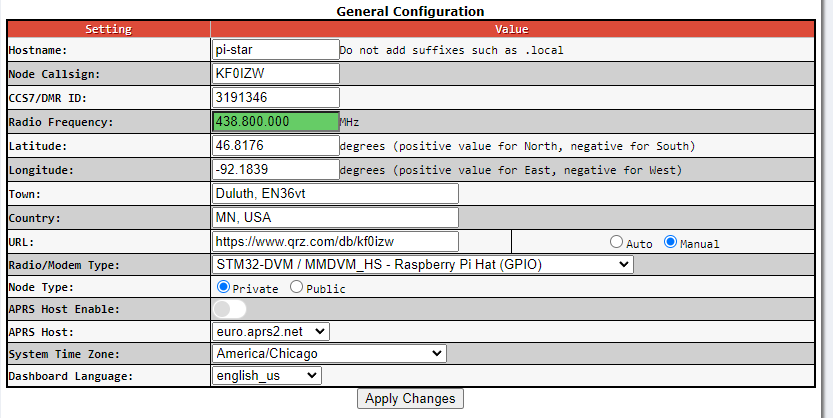
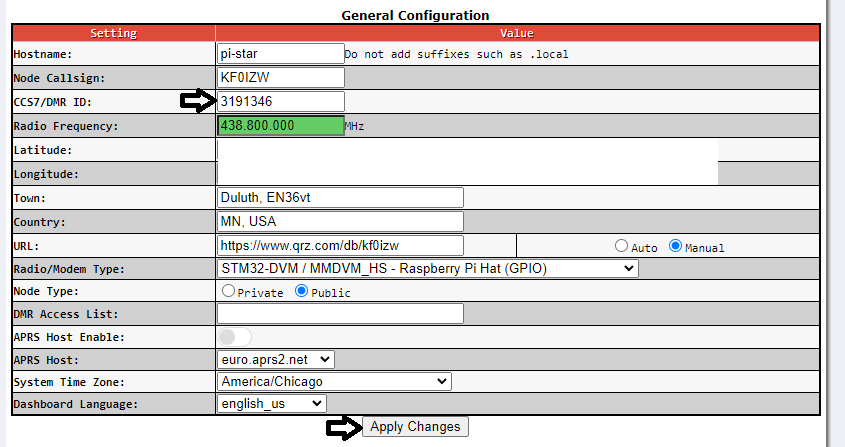
Once you're in the admin portal scroll change the values below under General Configuration and click Apply Changes when done.
Node Callsign: Your callsign.
Radio Frequency: Your MMDVM board should come with a print out with this information.
Keep in mind that 435.00-438.00 is satellite only. Check your local band plan for more information.
Latitude and longitude: You can find this in google maps by searching for an address and right clicking the pin. I rounded after 4 numbers.
Town: Your city, a comma, followed by your grid square locator. You can find this by looking up your call sign on QRZ and clicking the detail tab.
Country: If you're in US you can use your state and USA. (ex: MN, USA)
URL: You can change this to manual and use your QRZ link (ex: https://www.qrz.com/db/KF0IZW) if you want.
Radio/Modem Type: Check the printout that came with your MMDVM board.
System Time Zone: Change to your timezone.
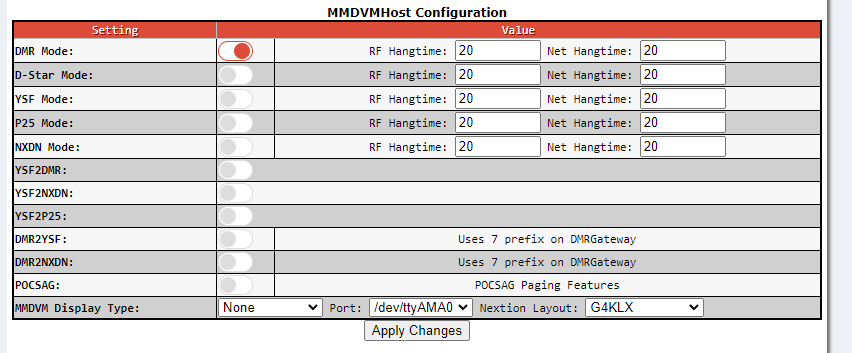
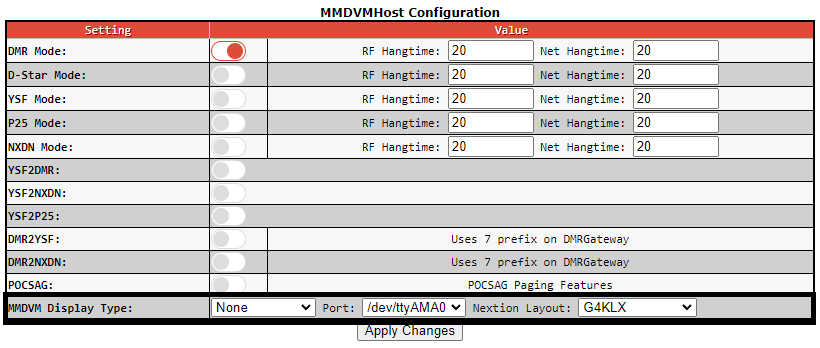
Enable the modes for your MMDVM board under MMDVMHost Configuration. Click Apply Changes.
Scroll down to DMR Configuration.
Change DMR Master if needed and click Apply Changes. Don't worry about the other settings, these will change after changing the DMR Master setting.
I'm using BM_3102_United_States (BrandMeister) in this screenshot. You'll probably know if you want something else.
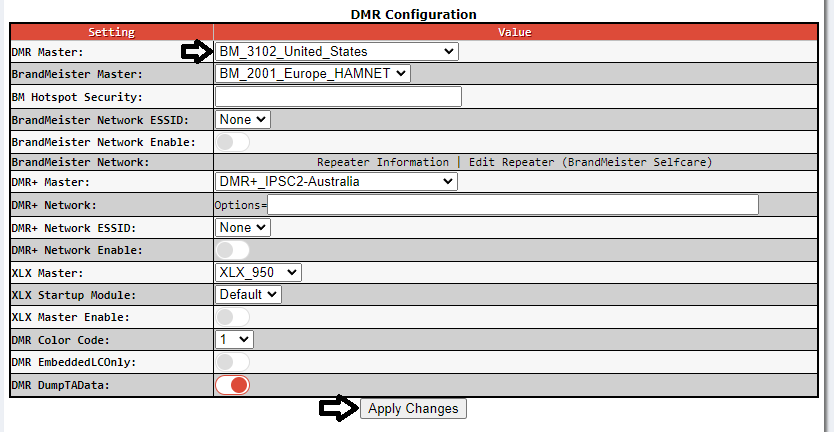
Enter your BrandMeister account's hotspot password in the Hotspot Security field. Click Apply Changes.

Scroll to General Configuration.
Enter your DMR ID number in the CCS7/DMR ID field.
Change Password
Scroll to Remote Access Password and enter a new password. This will change the password for the admin portal and SSH account.
You will be prompted to log back in after clicking Set Password

Wireless Setup (optional)
Scroll down to Wireless Configuration and click the Configure WiFi button.
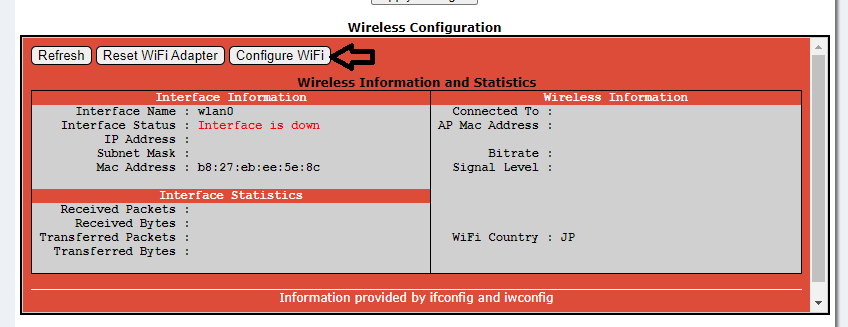
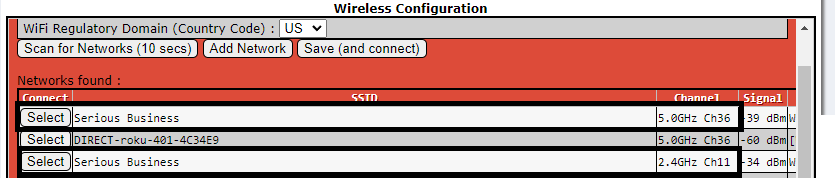
Change the country code if needed and click Scan for Networks.
This will take a few seconds and may look like it's frozen or the click didn't send before it populates the list.

Select your wireless network from the list. Note that you may have two networks: one for 2.4GHz and another for 5.0GHz.
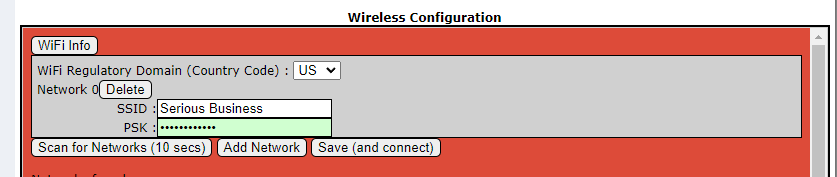
Enter your wireless network's password under PSK then click the Save (and connect) button.
If you see "Interface is down" after setting you connection and you know the wireless network settings are correct check the Auto AP setting under Firewall Configuration. Disable this setting and reboot the Pi.
MMDVM Display (optional)
If your MMVDM board has a display you can enable it in the MMDVM Display Type field under MMDVMHost Configuration.
That's it. Radio setup is enough to have its own post. If I create a post for that I'll update this post to include a link.
73 de KF0IZW