Before you do anything make sure to remove all filament from the printer. I didn't do this and it created a lot of extra work for me when installing the new fans. Take the extra two minutes and do this.
I started with the front fan but I don't think order really matters. Take note of which power cable is for the front fan. I put a piece of tape on it before I realized I could change out one fan at a time. Also take note of which cable is negative. Every printer is different so please take your own pictures and don't rely on mine.
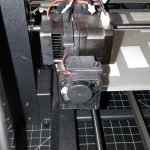
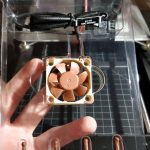
The power cable for the front fan is looped around the right side. You can slide the cable to the right to remove it. You shouldn't have to pull too hard, if it doesn't slide out easily it could be caught on something or pinched.

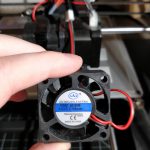
The front fan has two screws holding it on. One is in the top right corner and the other is in the bottom left corner. Remove one screw and hold the fan while removing the other. The next few images are for reference only. Make sure to take your own pictures and don't rely on mine being the same.
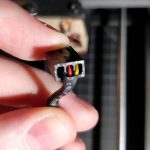
Disconnect the power from the fan and take note of the polarity. The fans I used had a 3 pin connector and came with a 3 to 2 pin connector but I just connected the two and left the third disconnected instead of using the converter. Do your own research on this instead of trusting me and burning your house down.
Side Fan
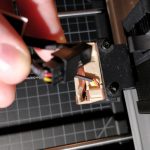
The side fan isn't as easy because the screws that hold the fan are also screwed into the heatsink. Both screws for the side fan are at the bottom. There is a plastic spacer on each screw (see the third picture below) which can fall if you pull the screw out of the fan. Do not remove the screws all the way or be ready to catch the spacers when they fall. Once the screws are loose pull the fan and heatsink off from the bottom up to keep the screws and spacers in place.
I had issues lining up the screws when putting the new side fan on. This was mostly because I didn't remove the filament and it was making things sit uneven. I ended up putting pressure on the fan and heatsink to get one screw in so I could find the hole for the second screw. This was a temporary fix so I could heat up and remove the filament that was causing the issue. After removing the filament I was able remove the fan and line everything back up evenly.
Here's a picture to give you an idea of the problem I was having. You might not be able to see it but there's a small piece of black filament that was pushing back on everything once the fan was unscrewed. I snipped it as close as possible then fed blue filament through until I saw blue filament through the nozzle and then removed the blue filament while the nozzle was still hot. Standard filament swapping steps.

Parts Used
- T10 Bit - Most precision sets will probably have this bit. There is nothing special about this kit. There's also a screwdriver only version of the same kit if you don't need everything else.
- Noctua NF-A4x10 FLX - 2 total
Note: The links above are affiliate links. Here are the model numbers if you're not into that.
ORIA FBA_OUS-HA21-O52118
Noctua NF-A4x10 FLX


