Do not run this on SSDs!
See this post for SSDs.
See this post for NVMe drives.
Short version
lsblk
shred -vzn 4 /dev/<device>
There are many tools out there that can do this. This way is quick and uses free software if you're willing to type a few commands.
You'll need access to a linux environment. GParted has a minimal live environment that includes everything you'll need. Most live linux distros should also work.
Creating bootable USB
You can use a program like Rufus to make a bootable USB drive just make sure you're wiping the HDD and not the USB drive.
If you're using chocolatey:
choco install rufus
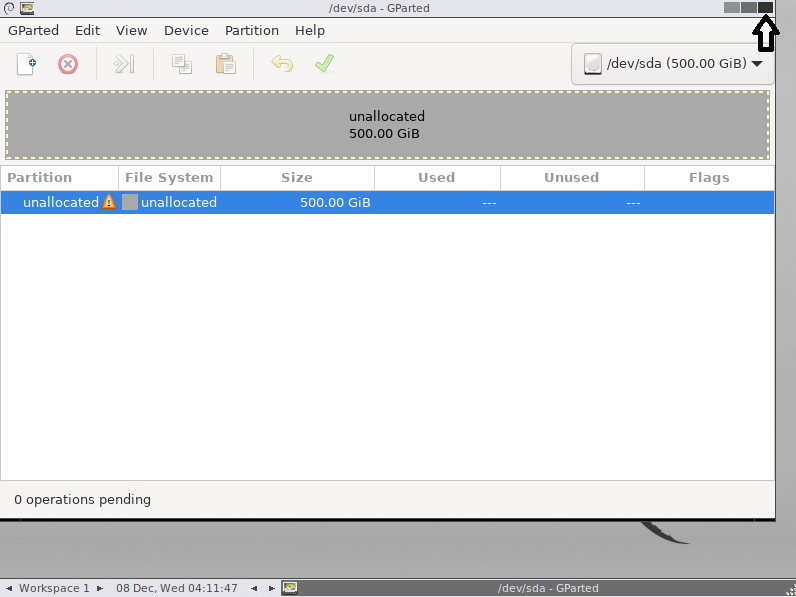
Booting into gparted
Boot to the USB device and press enter through the startup options to accept default settings.
Close the gparted window that opens on startup
 Right click anywhere on the desktop and select terminal > with root privileges.

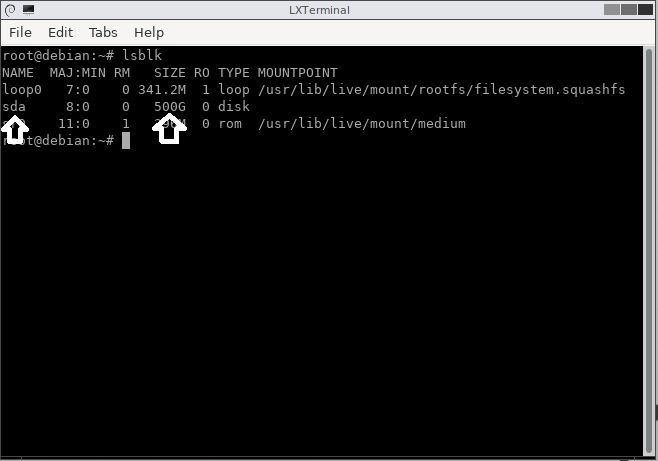
Finding the drive
Run lsblk (man page) to get a list of devices. As mentioned above, make sure you're selecting the HDD and not the USB drive used to boot. Now would be a good time to check your backups.
lsblk
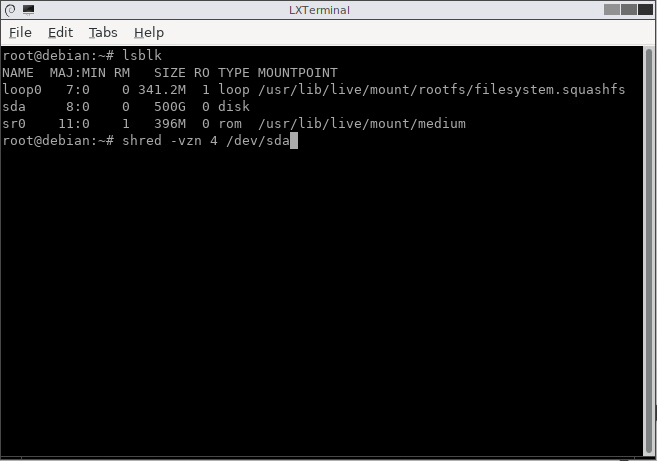
shred
Run shred -vzn 4 /dev/<device name> (from the step above ex: /dev/sda) for 5 passes on the drive.
The last pass will be all 0s.
Do not blind paste the command below. It does not include the device.
shred -vzn 4
Here's a description of the options. See shred's man page for a list of all options.
v: verbose - Shows progress
z: zero - Add a final overwrite with zeros to hide shredding
n <number>: iterations - Overwrite <number> times instead of default (3)

My SEO plugin says to include an affiliate link. After it's done you can take it outside and smash it with a hammer.
This information is for entertainment purposes only. Erase your devices at your own risk.