This post explains changing a netplan config from DHCP to static.
You can reverse the steps to change it to DHCP.
Here's a link to Canonical's Netplan page for other examples.
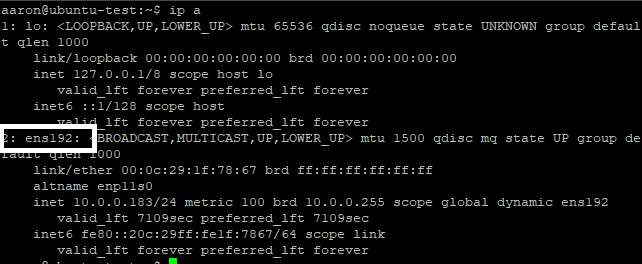
NIC name
Run ip a to get the network adapter's name.
ip a
netplan config location
The netplan configs are located in /etc/netplan/ each config is a .yaml file.
Most default installs will only have one file. You can type sudo nano /etc/netplan/ and hit tab for autocomplete or run ls /etc/netplan for a list.
ls /etc/netplan
Open the config in nano or your favorite text editor with
sudo nano /etc/netplan/00-installer-config.yaml
sudo nano /etc/netplan/00-installer-config.yaml
Changing netplan config
Find the network adapter in the config. You may only have one.
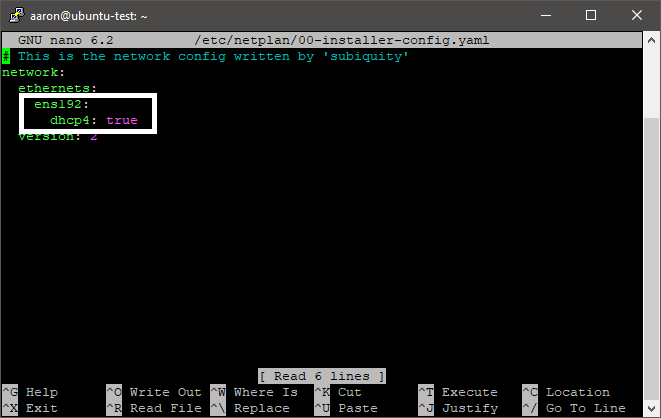
Delete the dhcp4: true line and replace it with the lines below.
Spacing is important in this config file.
search under nameservers is a comma separated list (ex: [home.acceptdefaults.com, lab.acceptdefaults.com]) of search domains.
addresses under nameservers is a comma separated list (ex: [10.0.0.2, 10.0.0.1]) of DNS servers.
via under routes is the gateway
      addresses:
        - 10.0.0.50/24
      nameservers:
        search: [home.acceptdefaults.com]
        addresses: [10.0.0.2, 10.0.0.1]
      routes:
        - to: default
          via: 10.0.0.1
Here's a blank template to copy and paste
      addresses:
        -
      nameservers:
        search: []
        addresses: []
      routes:
        - to: default
          via:

Press ctrl+X to exit then y then enter if asked to overwrite.
Run sudo netplan apply to apply the new netplan config.
sudo netplan apply
Your session will freeze after applying the new netplan config if you're SSH'd to the system and the IP changed.